The Devices tab can be found in the admin UI. How to access the admin UI is explained in [KB7712].
This article includes the following topics:
- Version information
- Finding a device
- Alternative way to find a device
- Device list
- Actions on a group of devices
- Device configuration
Version information
At the top of the Devices page the compatibility range for device firmware is shown.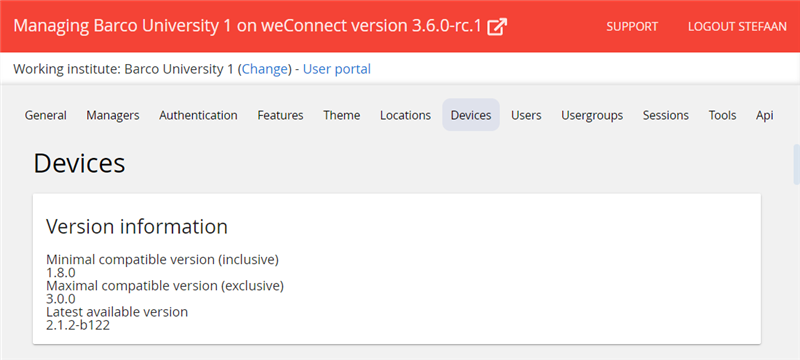
Finding a device
Filtering the list of devices can be done in the Filter section ion sub-tab Devices.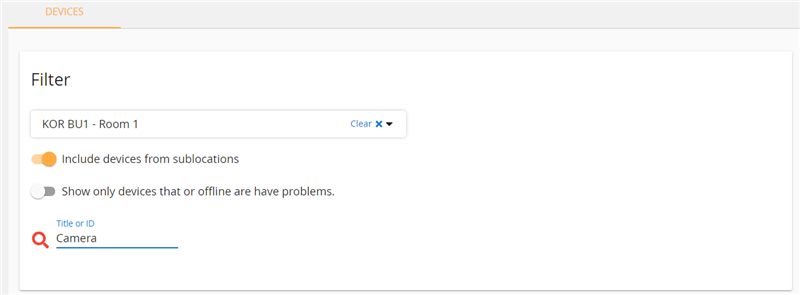
You can apply a number of filters to easily track your device. Filters can be combined for higher efficiency.
- if you know the room where the device is paired to, you can select it in the hierarchy of the institute
- you can include devices from sublocations
- you can opt to only show devices that are off-line or that have configuration problems
- you can search on title or ID of the device.
Alternative way to find a device
Devices can also be found in the Locations tab of the admin UI.
- Go to tab Locations
- Navigate through the hierarchy of the institute and select a room
- Click on the Devices sub-tab

- Scroll down to find the list of devices paired to the selected room
Device list
In the list of devices you can see some important information at a glance.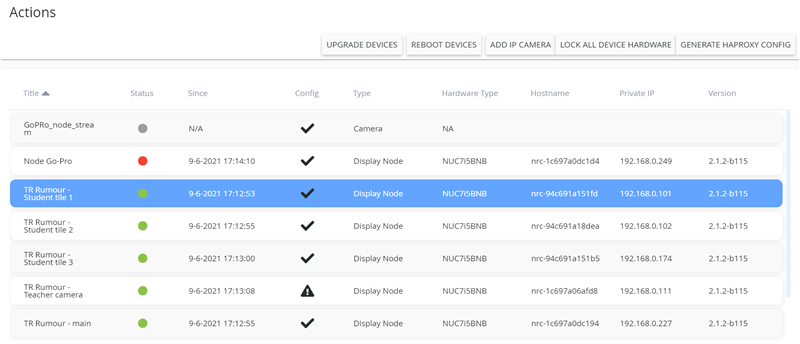
In the device overview, the following fields are available:
- Title: the name that has been assigned to the device
- Status: the status of the device
- green bullet: device up and running, on-line, no issues
- orange bullet: device is booting or connecting
- red bullet: device is off-line
- Since: the time when the status last changed
- Config:
- a check mark indicates that the configuration saved and locked into the device matches the currently connected physical inputs and outputs
- if this is not the case, a warning icon is shown (i.e. triangle with exclamation mark)

- Type: type of the device, e.g. display node, camera, etc.
- Hostname: the hostname of the device
- Private IP: private IP address of the device
- Version: the actual version of the firmware on the device
This list also allows to quickly check if all AV connections to the display nodes are as they need to be: a warning is given in the Config column to indicate a mismatch with a previously saved and locked configuration. This can indicate a faulty or disconnected third party device.
Actions on a group of devices
A number of actions can be triggered on room level. The actions available depend on the feature set that is enabled for your institute.

Upgrade devices
This forces all devices in the room to upgrade to the latest firmware.
Reboot devices
This forces all devices in the room to reboot.
If you trigger this action during a lecture, it will not be stopped. During the reboot process, hosts, operators and participants will loose audio and video at some point in time, but all streams will be restored a number of seconds after the reboot of the devices and the lecture will still be resumed.
Add IP Camera
A stream from an IP camera can be added as a 'virtual' node to the list of devices in a room. It will pop up in the list as shown in the screenshot below.
Configuration can be done in the same way as configuration of all other devices. See section Device configuration in this article.

Lock all device hardware
This locks the connected hardware for all devices under this location.
 |
Locked settings remain available in the configuration file, even if the related hardware (USB or HDMI™) is disconnected from the device, or replaced by other hardware. E.g. new display connected to the HDMI output of a device, or a new USB camera connected to the USB port.
It is advised to always lock the configuration to prevent settings from being lost.
If the connected hardware is removed or modified while the settings are locked on the device, weConnect triggers a notification (warning icon) in the list of devices and in the configuration page of the device.
Note: If hardware has been removed from a device while the configuration settings are locked, do not unlock them until the moment that the hardware, or the replacement hardware is connected back again. This prevents the loss of configuration settings, and non-operational rooms!
If the same hardware is re-connected, no further action is required. If alternative hardware is connected (e.g. a different USB camera), unlock the settings, make changes to the configuration as needed, and lock the settings back again.
You can unlock each setting for each device one-by-one in the device configuration page. See section Device configuration in this article.
Generate HAProxy config
You can generate an HAProxy configuration file at room level, and at all higher levels. It is linked to the configuration of the devices which are defined on that location, or at lower levels. When devices have been added or modified a new HAProxy configuration file must be generated.
Device configuration
Click a device in the list to select it.
The configuration page of the selected device opens below the device list.

Actions
Click Actions under Selected device to open the action dropdown menu. These are actions that can be performed on the selected device.
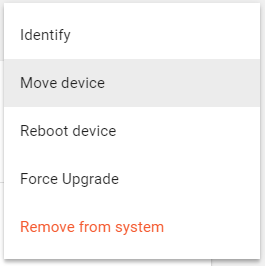
- Identify: shows the Title of the device on the display connected to it
- Move device: allows you to relocate a device from one room to another within the same institute.
This is a useful tool when replacing a broken device with a spare device. You can prepare spare devices in a “spare room”. Make sure these are always updated.
This practice greatly reduces the mean time to repair (MTTR) of a classroom. - Reboot device: reboots the device remotely
- Force upgrade: triggers the upgrade of the device's firmware
- Remove from system: removes the device from the institute. Afterwards the device can be paired to another room in the same or in a different institute.Caution: Be careful if you remove a device from the system as this can lead to invalid room configurations.
Base settings
In this section you can change the Title of the selected device.

Remote access
You can allow a designated person from the Barco escalation service group to access a device to perform remote service actions. You will be able to see who accessed a device. Remote access is established over a secure tunnel connection and enables temporary access for the service person. A two-factor authentication implementation creates a secure way to perform remote maintenance. We keep full visual audit logs for every intervention which can be obtained upon simple request to your Barco contact.
For security reasons date, time and the person who has last changed the remote access status is shown.
Location
Shows the location of the device in the institute hierarchy.
Network
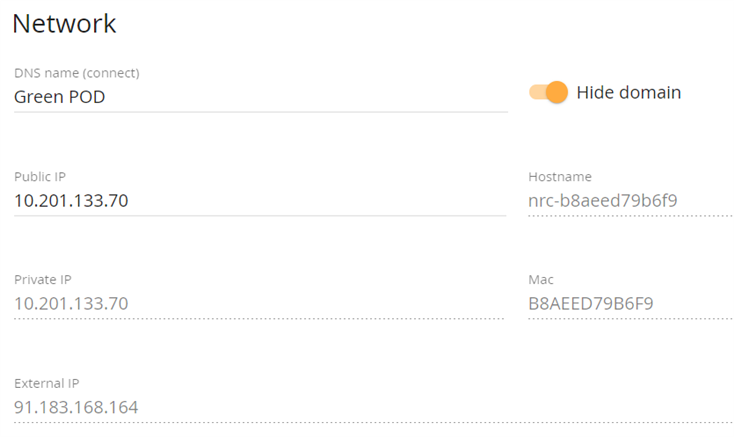
Lists the network configuration of the device. Some of the settings can be changed, others are informational only.
- DNS name: a name that can assigned to a device to which you can share. This name must be an exact copy of the DNS-name defined in the DNS server (contact your IT department). It is displayed on the display connected to a main device.
Preferably this is meaningful and catchy name that makes it easy to discover the display to share to, e.g. Green POD in a collaboration room where each pod has a different colors. - Hide domain: if enabled, the DNS name is displayed without domain specification on the screen connected to the main display node
- Public IP: can be changed if required
- Host name, Private IP address, MAC address and External IP address are informational only
Time
A time server can be specified under Location Settings in the Locations tab of the admin UI. See [KB7718].
If the device cannot synchronize with the NTP server a reset of the hardware clock might solve the issue. The device reboots

Displays
In this section you can configure the display(s) connected to your device:
- NCN-100 supports the use of one display (1080p @60fps advised)
- NCN-210 supports the use of up to four displays (each one up to 2160p @60fps)

The following settings that can be changed.
- Identify screens: click to identify the displays connected to a device. A message appears on the displays.
- Lock display: see section Lock all device hardware
- Mode: allows overriding the preferred EDID timing of the connected display. This can be useful when you want to use a different resolution to match other screens in the classroom.
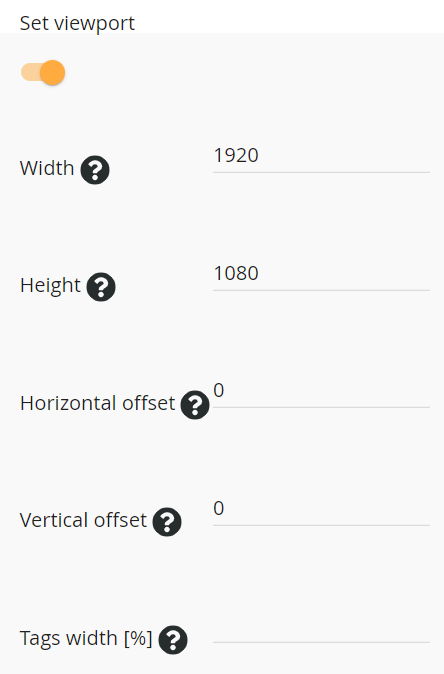
- Set viewport: it is possible to only show a part of the source image on the display by defining a viewport.
- Position: for devices that have more than one display connected, the order of the displays can be changed. This is useful in case the displays on one device are used in Extend mode.
Audio inputs
All audio input devices discovered on a device are listed in this section. The following settings can apply:
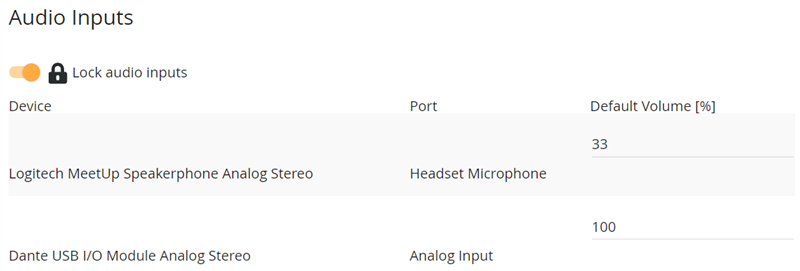
- Lock display: see section Lock all device hardware
- Default volume [%]: volume values can be tweaked and matched to each other during a test lecture once a room configuration is created.
For remote learning experiences it is essential to set the default volume to a level that doesn't cause clipping and that doesn't need too much amplification at the receiving end.
Audio outputs
All audio output devices discovered on a device are listed in this section. The settings are similar to the audio input settings.

Default screen sharing volume
This value is informational and is set from the Calibrate audio dialog and determines the volume of screen sharing relative to the other audio.

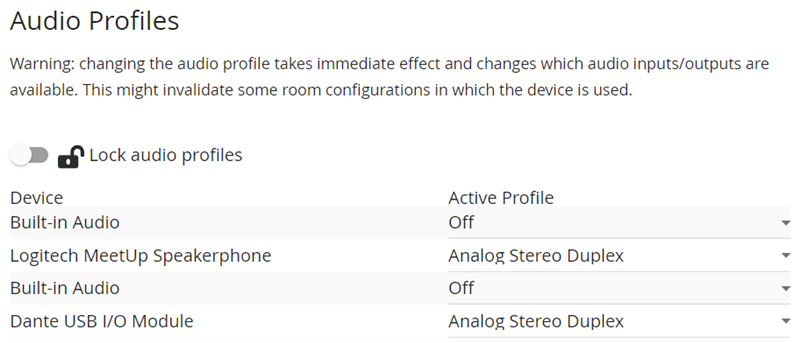
Audio Profiles
In this section you can define the audio profile for the audio equipment connected to a device: analog or digital (surround) stereo for inputs and outputs,
Calibrate Audio
![]()
Calibrate audio initiates a remote audio test session which allows to remotely configure volume and microphone levels for those classrooms equipped with this capability. See [KB7751] Audio setup and calibration.
USB Cameras
USB cameras can be connected to a device to allow for content streams to be shared.
The following parameters can be changed:
- Encoding: choose the encoding standard for your stream (YUYV, MJPEG)
- Resolution: choose a resolution for the video stream
- Framerate: choose a framerate for the video stream. The available options depend on the chosen resolution.
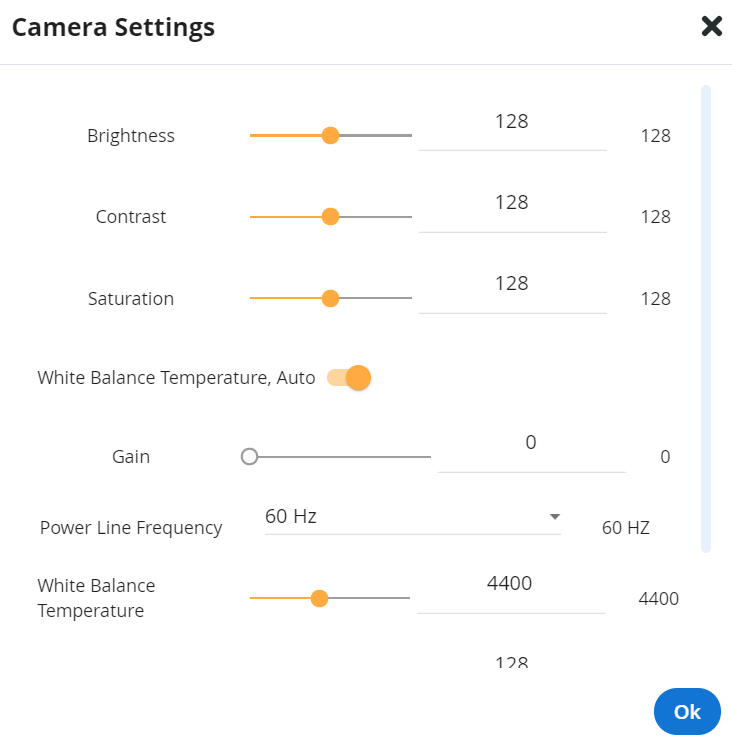
- Image settings: change the settings to your preference (scroll down in the window for more camera settings)
Custom sources
Custom sources can be added to every device. Or they can be added to a dedicated virtual device created using Add IP camera. At this stage you can use RTSP streams available on the network.

Click Add source and enter the required parameters:
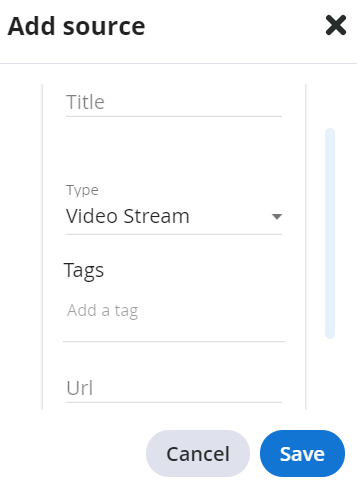
- Enter a title for the steam: this name appears on the source in the teacher user interface
- The type is Video Stream
- Add tags as required
- Enter the URL of the stream, e.g. rtsp://10.200.20.4/roomcam/stream.amp
A list of confirmed integrations with 3rd party IP streams is available in the Device Integration Support Guide.
Sharepod dongle
To set up a sharepod dongle, follow the instructions below.
- Make sure that the computer that will be used to set up the sharepod is connected to the same network segment as the selected device
- Connect your sharepod to a USB-port of the computer
- In the Barco Pairing Tool, select the device in the Devices tab and scroll down to the Sharepod settings.
- Click the button to pair the sharepod with the device

- A message appears on the screen: 'The Sharepod is successfully paired'.
Once the sharepod is paired to the device, you can set the access code in the configuration page of this device.

Daily reboot
The devices can be configured to automatically reboot daily at a specific time (hour), taking into account the local time zone of the device. Typically a reboot is chosen to be triggered at night.
It is advised to configure the daily reboot in order to improve the stability of the product over a longer time!
