

The calendar capability allows you (as a ClickShare admin or IT admin) to display your room calendar on the monitor connected to ClickShare devices.
Before you get started
To allow devices to get the calendar, the XMS Cloud must be “connected” to your Microsoft Azure Account. This enables us to discover your rooms and share their credentials with the CX devices.
As part of this process, approvals from your Organization’s Office365 admins are required.
- The new rooms added in Office365 may take up to 24 hours to be visible in XMS even if you do a manual rediscover.
- Both XMS tenant and Office365 tenant need to be unique and cannot be linked to another one.
How to set up this capability (ClickShare/IT admin only)?
Note: For further details, you can consult to the relevant topics in the XMS Cloud User Guide (how-to, see KB 9362).
For detailed security recommendations on the deployment of the calendar integration, see XMS Cloud Security Whitepaper (how-to, see KB 9362).
Note: Depending on the functionality (e.g. notification feature) enabled on your XMS Cloud, some images and information in the procedure below may vary slightly.
- In the XMS Cloud, go to the Microsoft Calendar page and click Connect Azure Account.
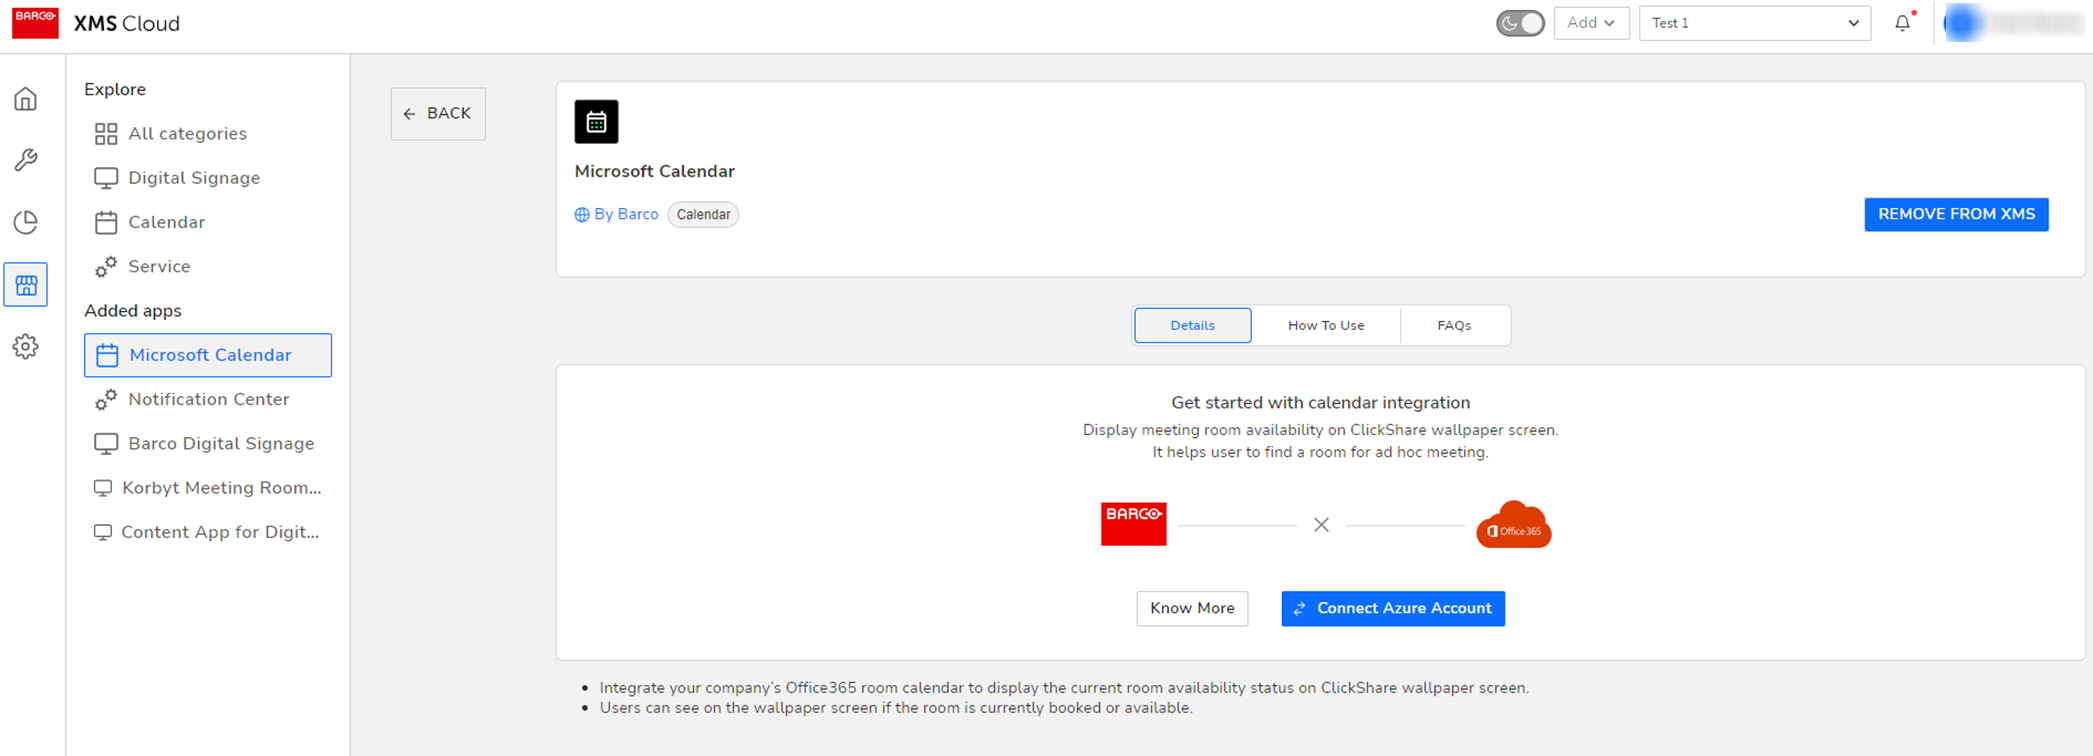
You will be redirected to Microsoft Azure account.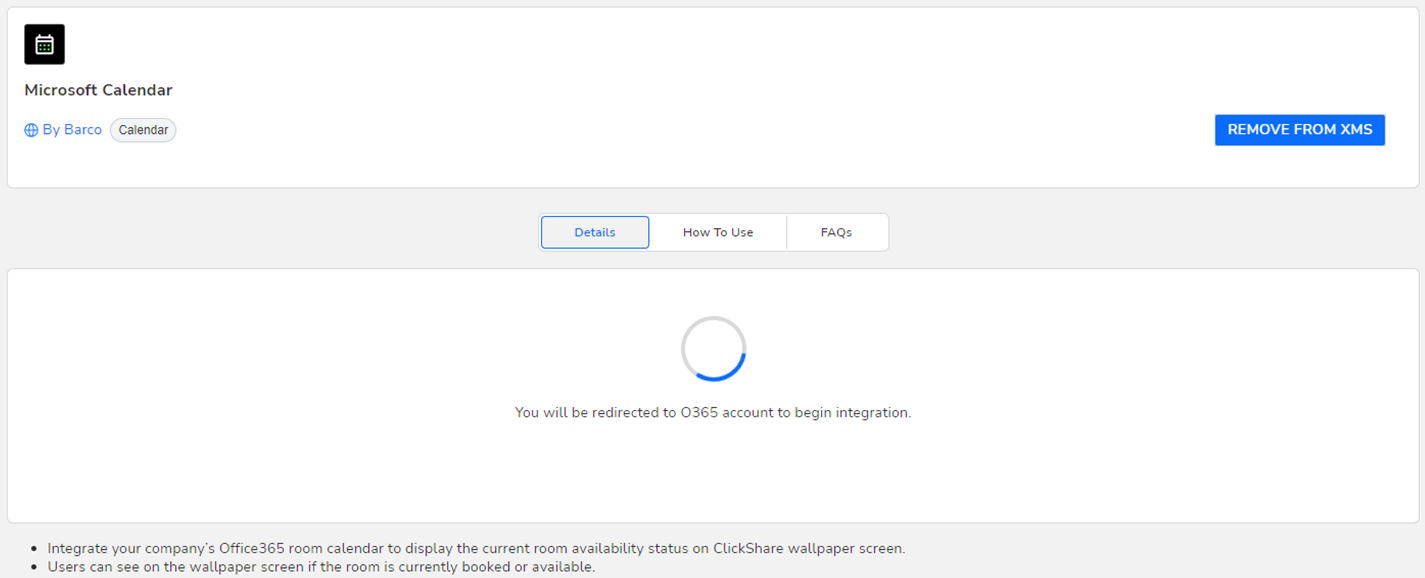
- Post Redirection and logging in, you will see the approval screen for 'Clickshare Meeting Room Discovery'. Read the message and click Accept.

- After acceptance, you will be redirected back to XMS Cloud. This process should finish in 10-30 minutes but sometimes it may take longer.
Click Check Status to check the Connection status between XMS Calendar application and Azure Calendar account.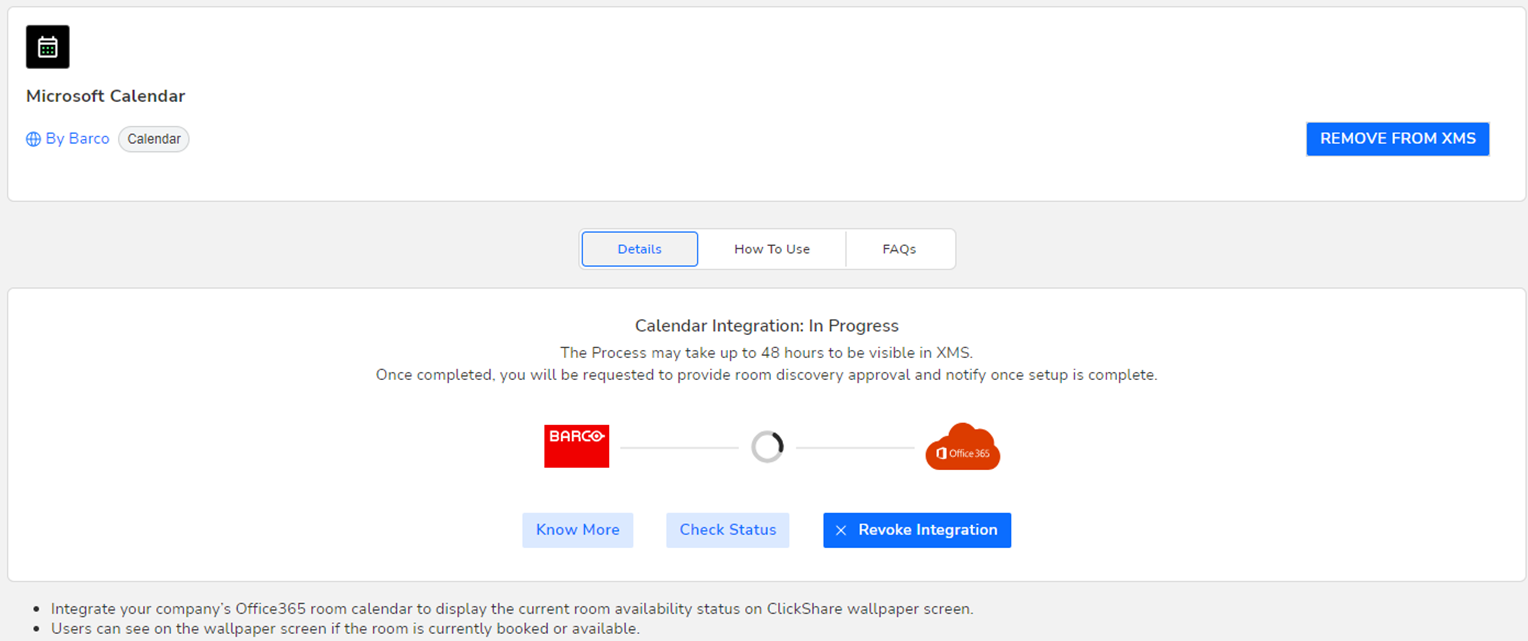
Click Revoke Integration to terminate the Calendar Integration process. The following message dialog appears to proceed cancellation process.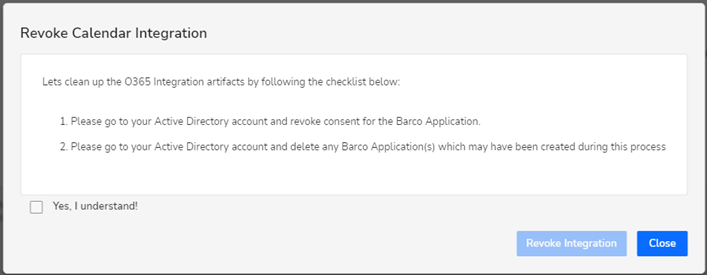
Note: Following notification message can be seen upon the partial completion/integration of the calendar integration process. This message will only appear if on your XMS Cloud you have enabled the notification feature and subscribe to Cloud Category services.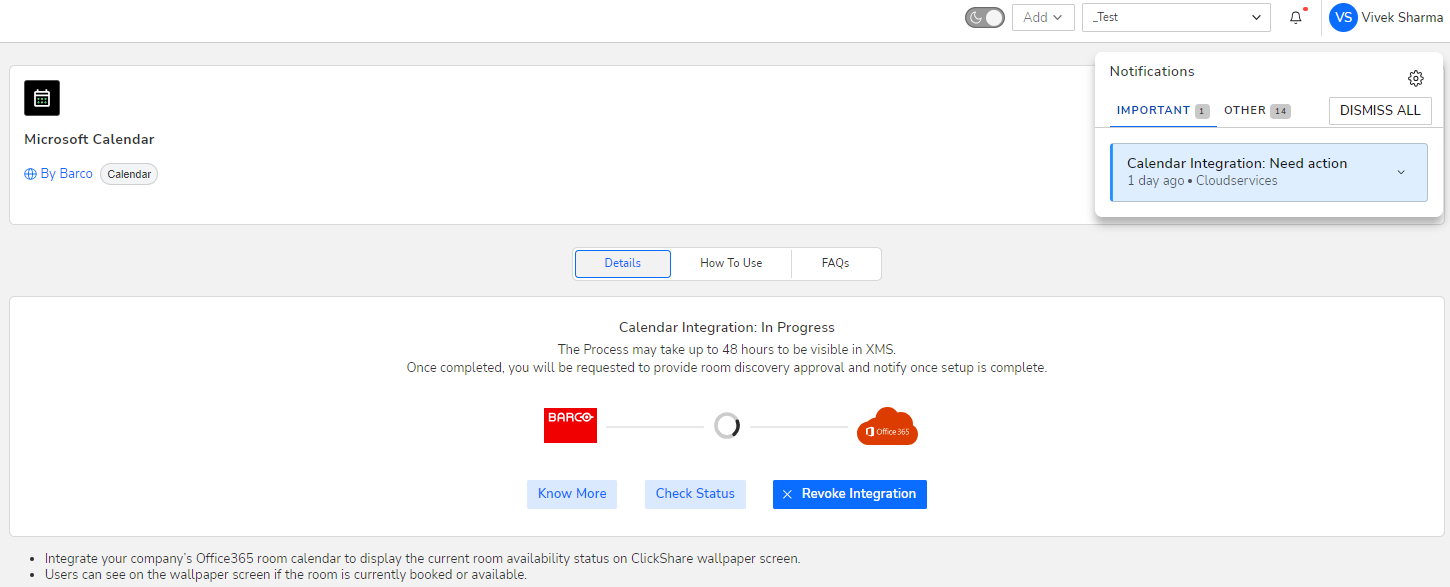
- After the connection is established, the Continue Integration button will be shown. Using this button, the user will be redirected to an Azure account where the Azure Office365 account admin must have to give Barco permission to discover the Azure Calendar meeting rooms.
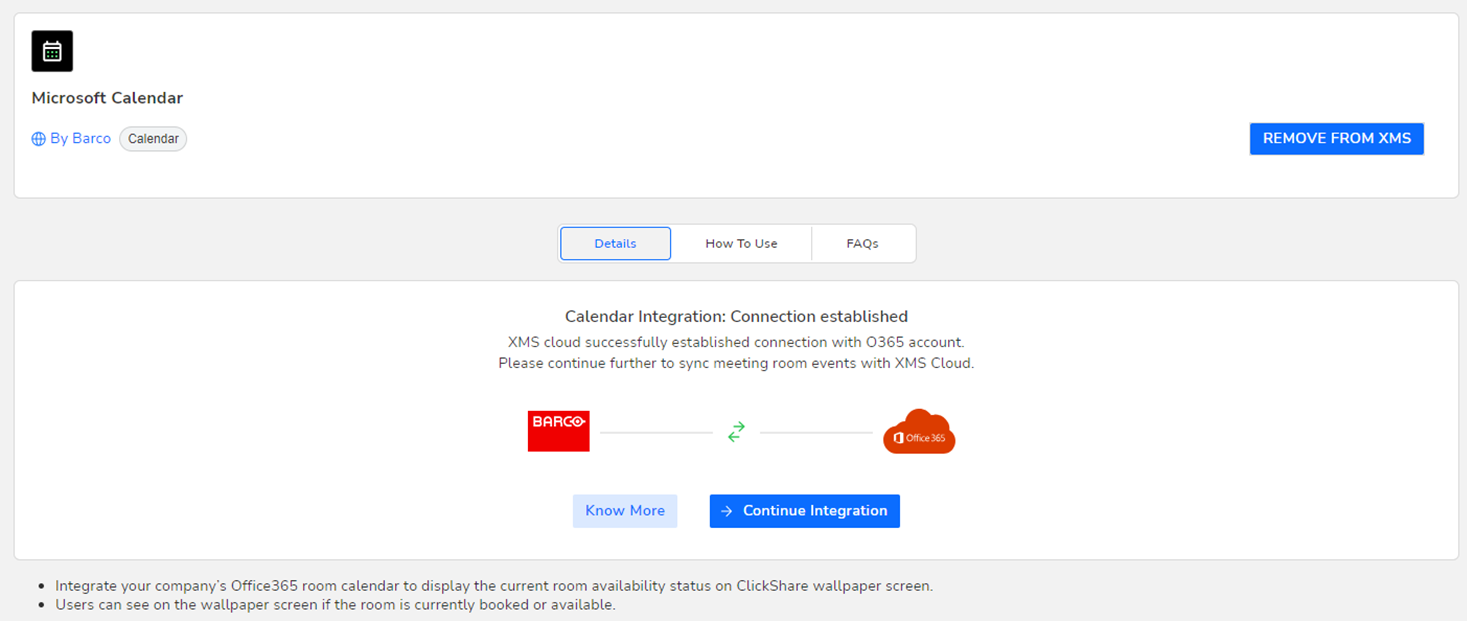
- Post Redirection and logging in, you will see the approval screen. Read the message and click Accept.

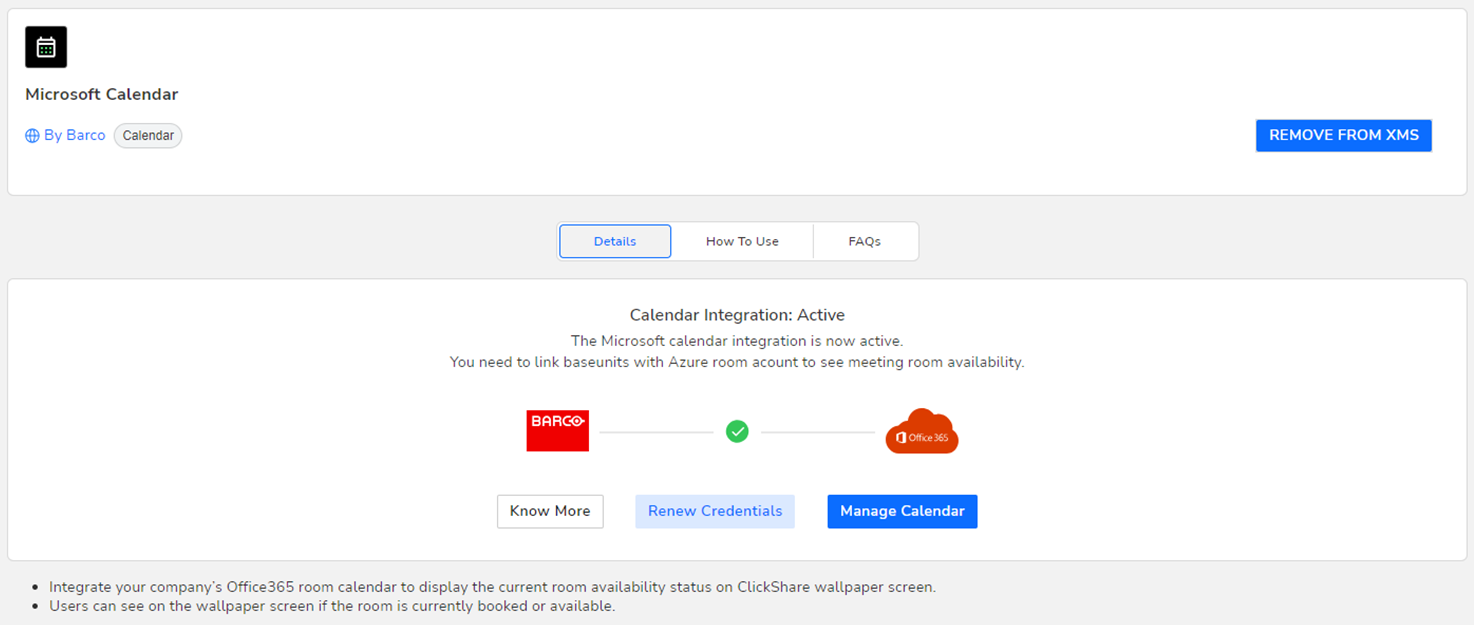
- Your connection with Microsoft Calendar is now active. Click the Manage Calendar button to link Base Unit to your calendar meeting room. You will be redirected to the Microsoft Calendar page where you can manage your rooms with Base Units.
Note: Following notification message can be seen that the calendar integration process is successful. This message will only appear if on your XMS Cloud you have enabled the notification feature and subscribe to Cloud Category services.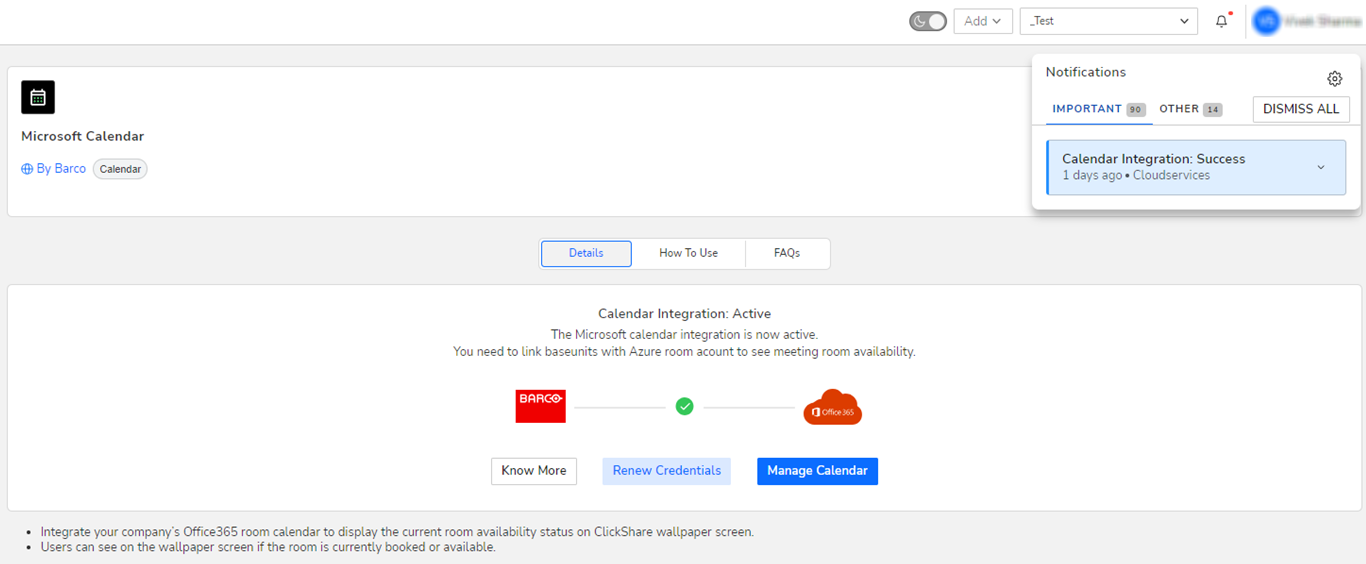
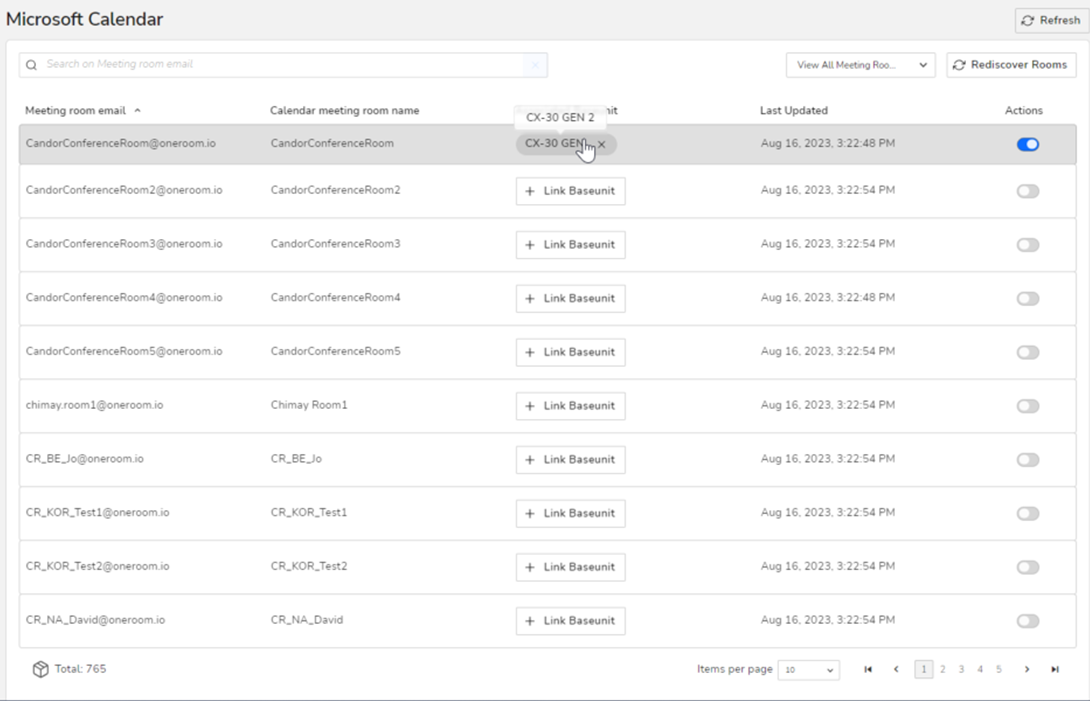
- Link Base Unit to your calendar meeting room:
- Click the + Link Baseunit button next to the Calendar meeting room name where you want to link the Base Unit.
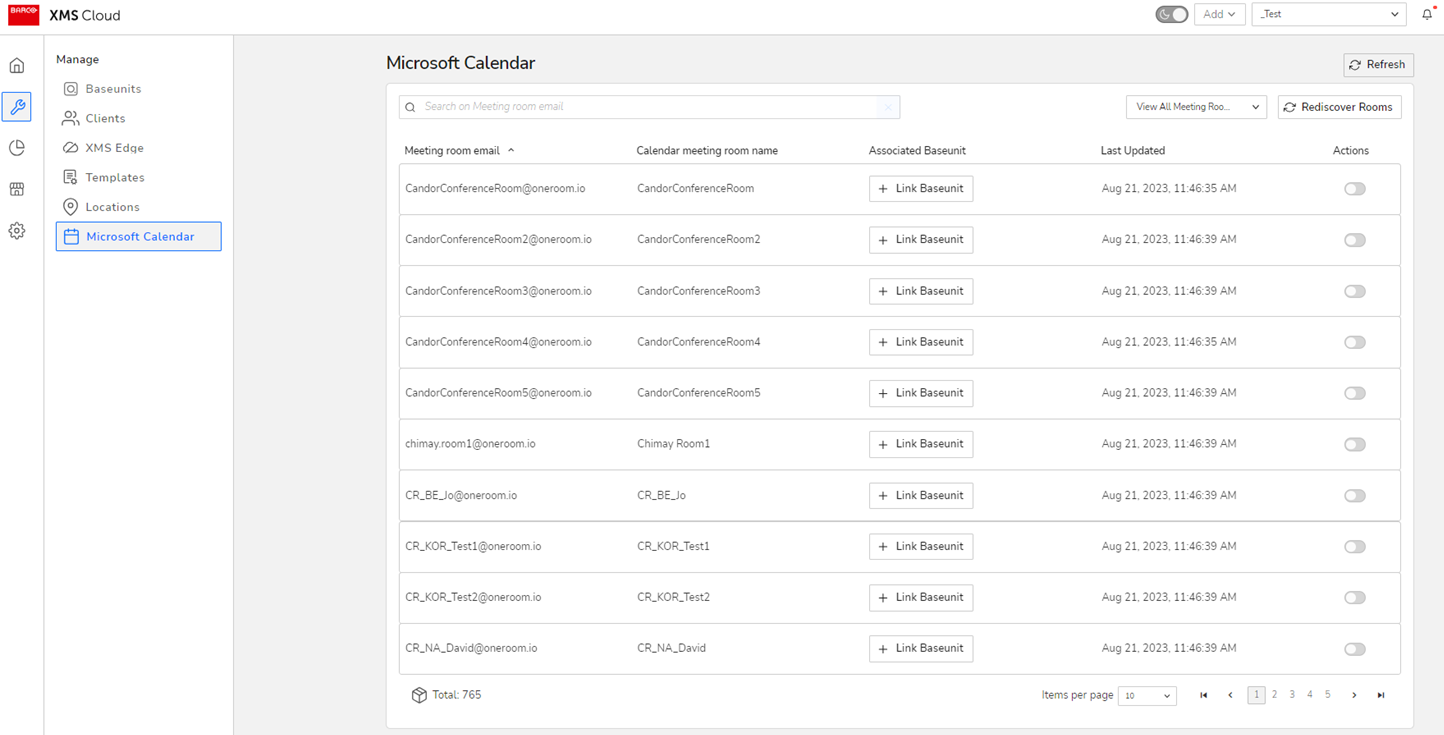
- Select your Base Unit from the list and click Link Now.
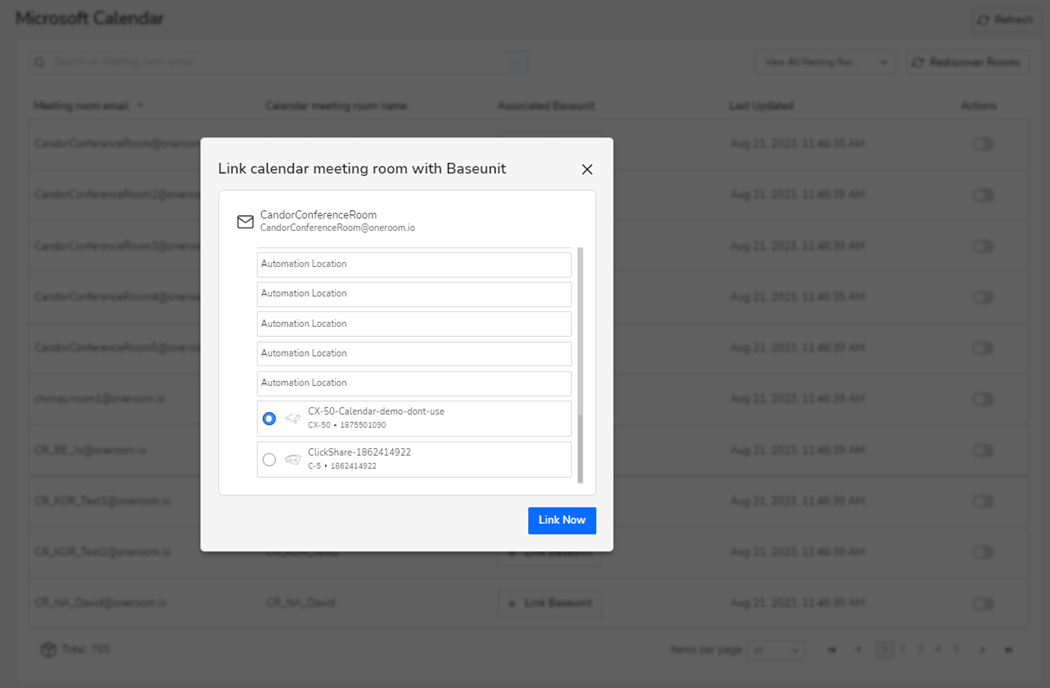
- Base Unit has been linked and your calendar is set up now.
- Click the + Link Baseunit button next to the Calendar meeting room name where you want to link the Base Unit.
Note: Click REMOVE FROM XMS to delete (or disconnect) your calendar integration with Office365.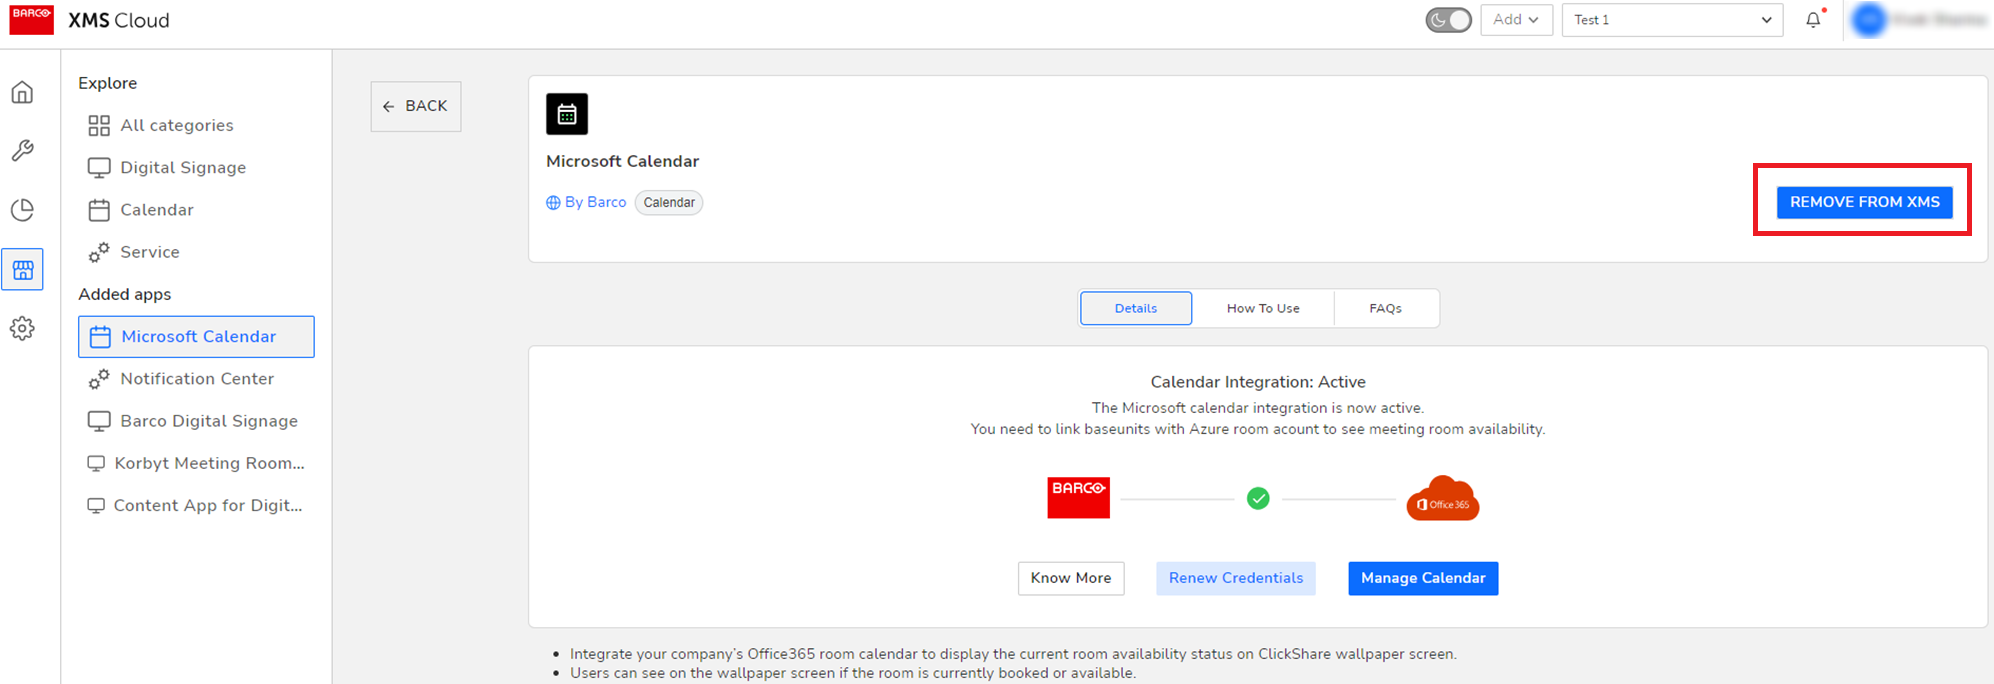
Normally, the user does not need to do anything for expiring credentials, as XMS auto-renews them. For this XMS runs a periodic check every midnight for the ClickShare Calendar Sync application credentials, if expiring within the next 7 days. The renew credentials will be valid for next six months if renewed.
If the user desires to renew their credentials at the moment, they can click Renew credentials.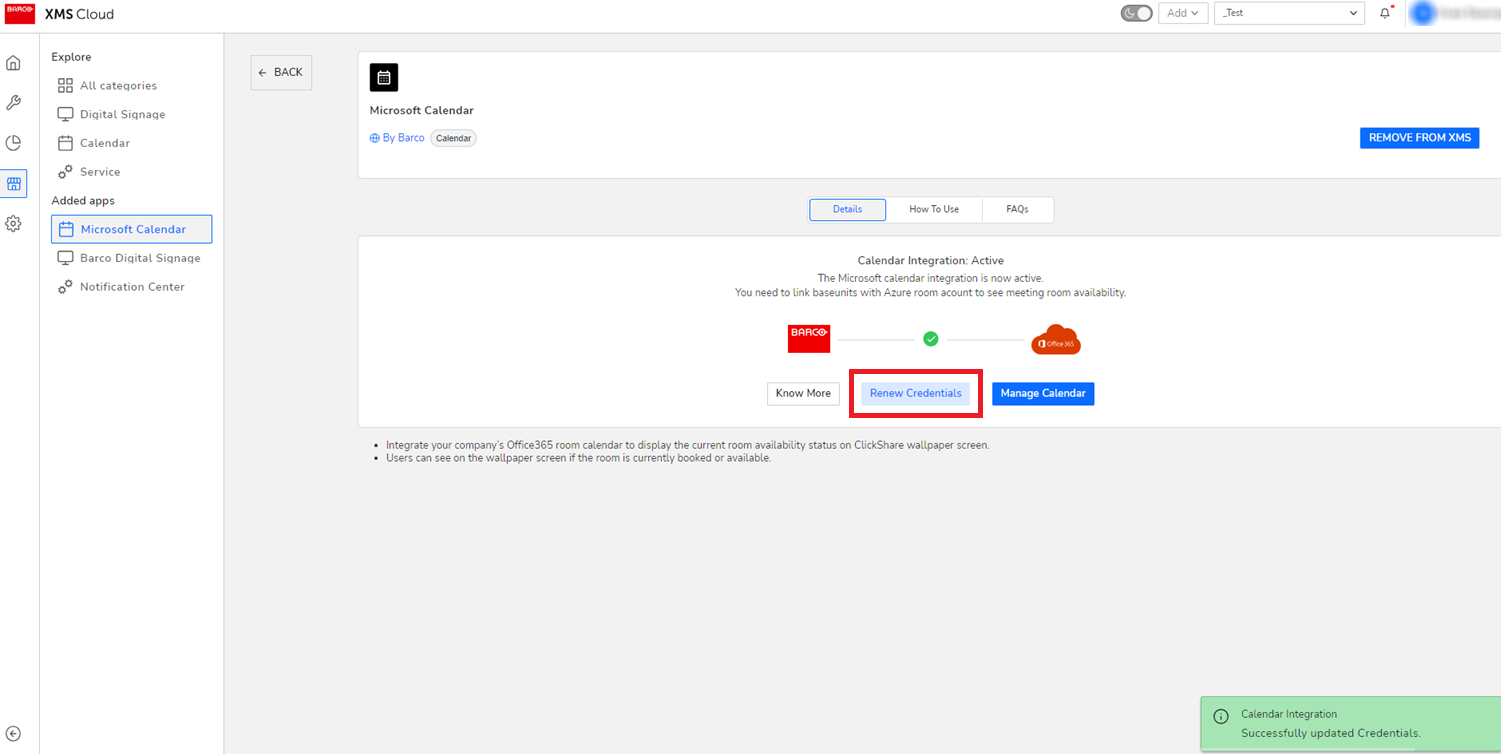
Click Rediscover Rooms to snyc with Microsoft AD account room emails and sync those rooms with XMS Calendar.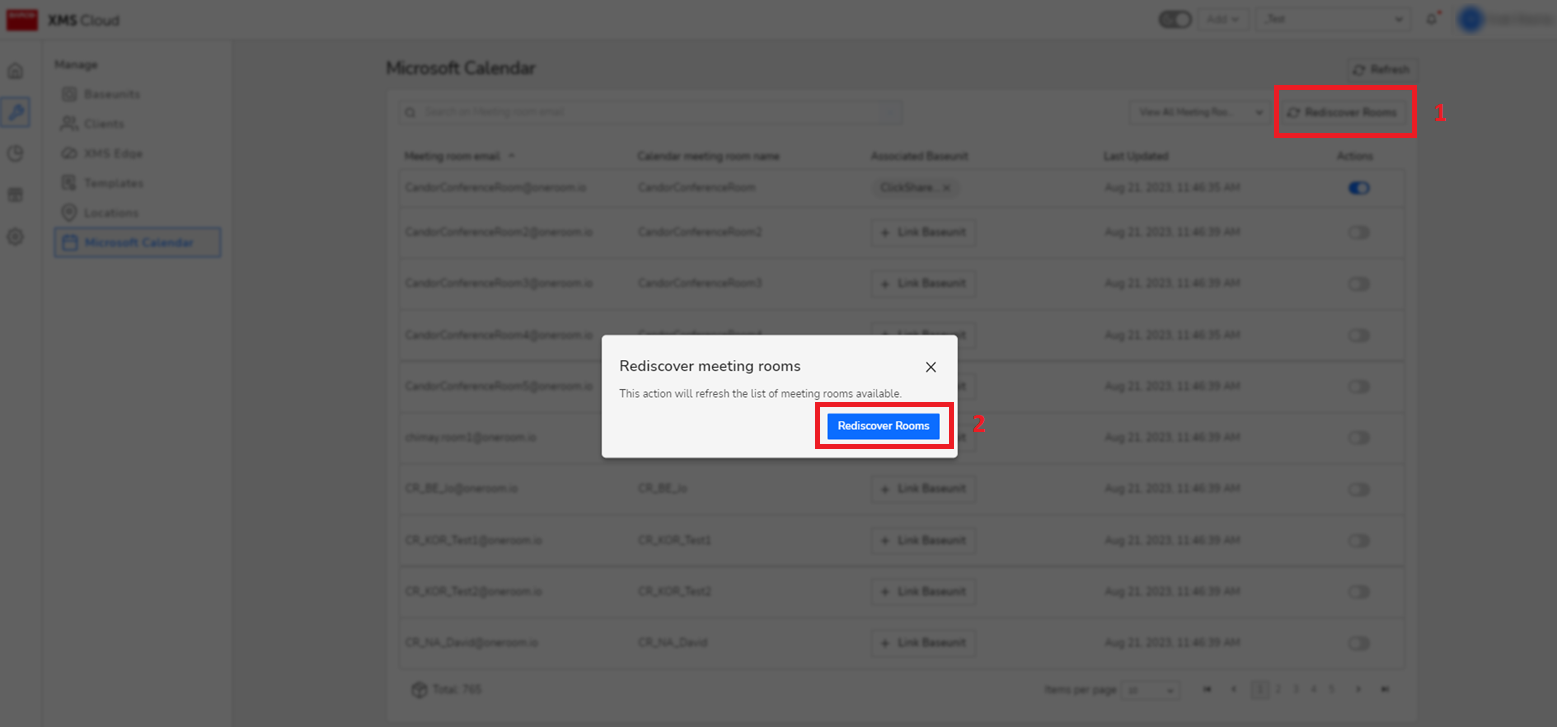
Troubleshooting
- In case you have accidentally revoked Barco-multi-tenant Calendar AD app’s service principle through Azure portal, there will be warning sign visible on the Rediscover Rooms button and on the Microsoft Calendar page.
Follow the onscreen instructions to resolve the issue, this will help you to reintegrate the whole calendar again and allow you to start the calendar integration.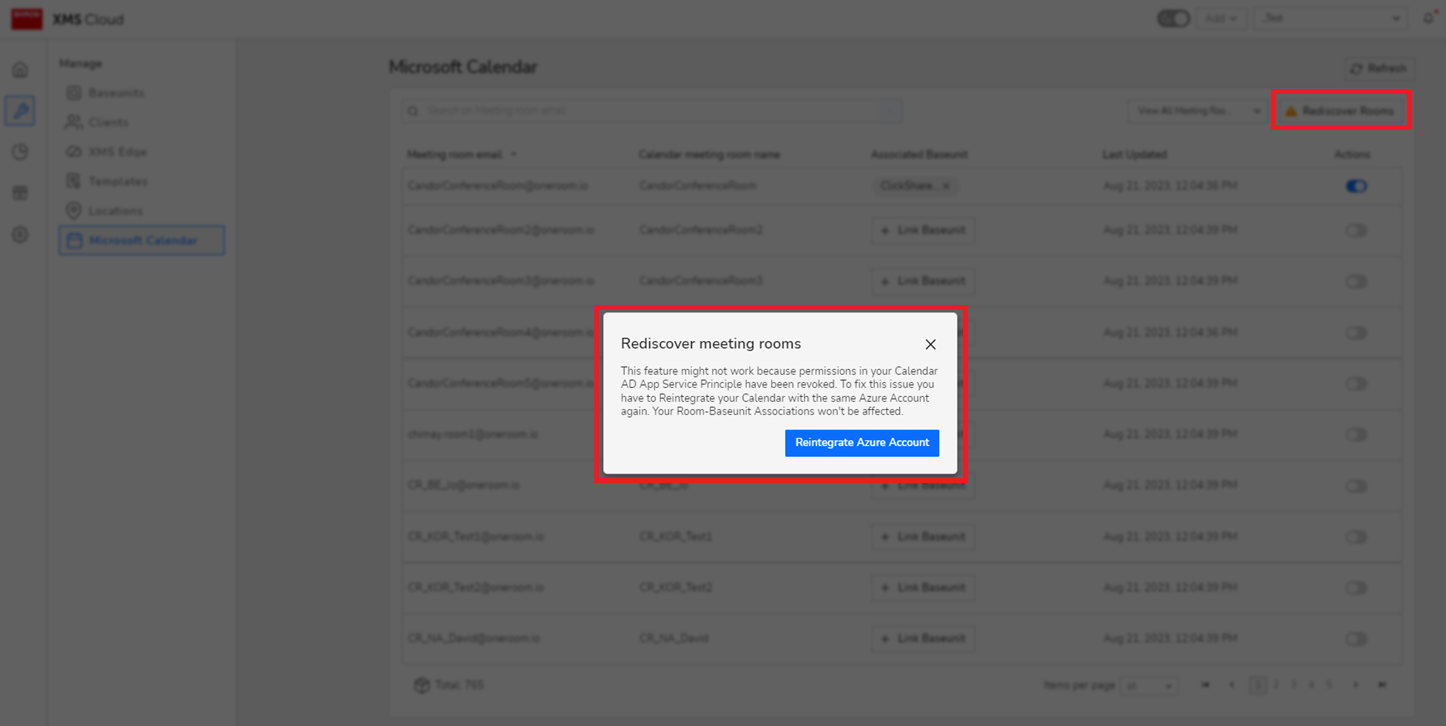
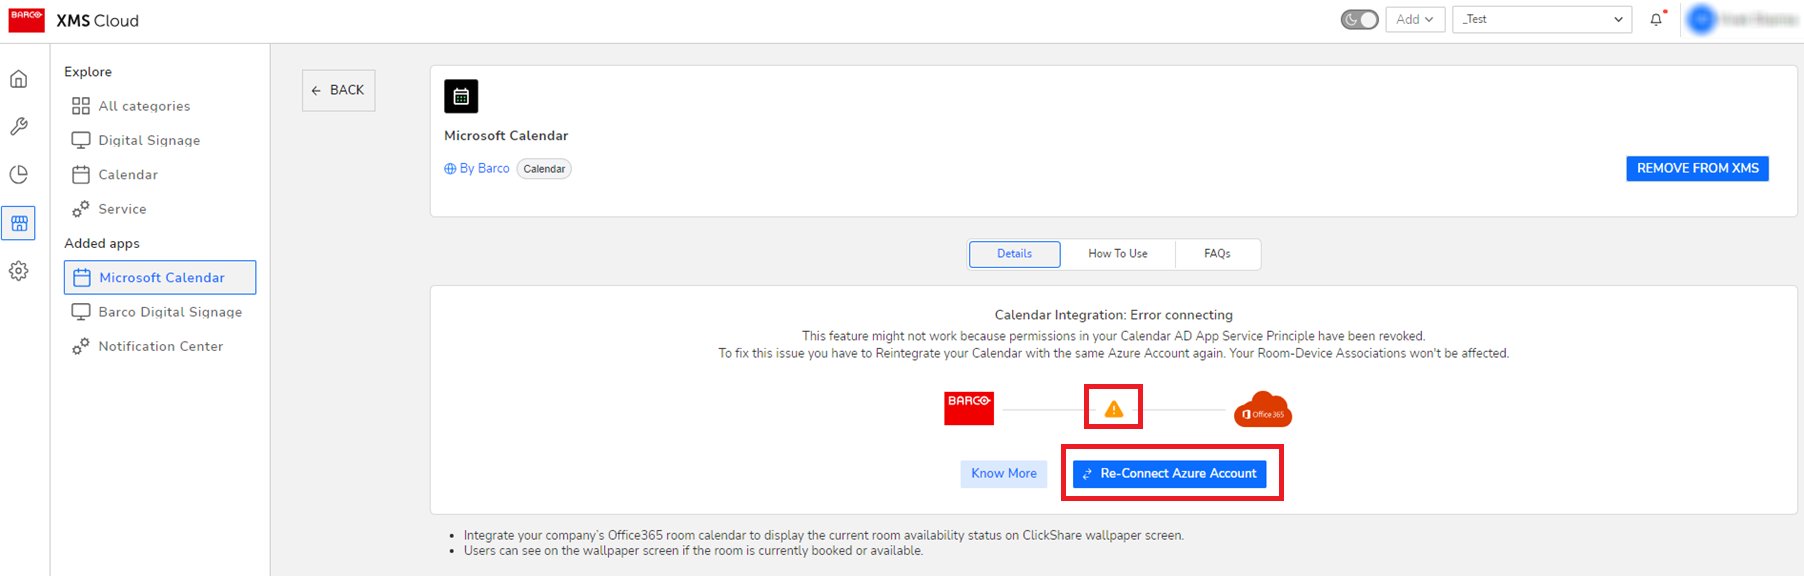
- In case you have accidentally disabled user sign-in in Barco-multi-tenant Calendar AD app’s service principle through Azure portal, there will be warning sign visible on the Rediscover Rooms button and on the Microsoft Calendar page.
Follow the onscreen instructions to fix this issue.


