

Prerequisites
- CX-50 Gen2 running firmware 2.21 or above
- USB peripherals (Camera and speakerphone)
See KB 3554 for details - Compute unit that have been tested (Windows systems running MTR):
- HP Elite Slice G2
- Lenovo ThinkSmart Hub 500
- Intel NUC
- Touch controller
- Display
- Cables: HDMI™, USB and Ethernet
Info! Depending on the touch controller used: such as the Logitech Tap, a converter (Logitech converter) may be required as an interconnecting device to connect the touch controller to the compute unit.
Installation and configuration
Installation (Intel NUC and Logitech Tap as an example)
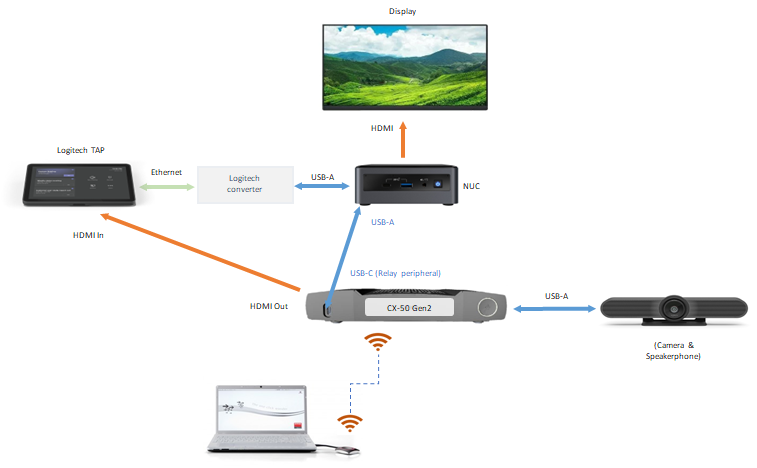
- Connect NUC HDMI output to the display using an HDMI cable.
- Connect NUC USB-A port to the Logitech converter using a USB cable.
- Connect the Logitech converter to the Logitech TAP via an Ethernet cable to make the HDMI input port of Logitech TAP available.
- Connect the CX-50 Gen2 HDMI output to the Logitech TAP HDMI input using an HDMI cable.
- Connect NUC USB-A port to the CX-50 Gen2 front USB-C port using a USB cable.
- Connect USB peripheral to the CX-50 Gen2 rear USB-A/C port using a USB cable.
Configuration
- In the ClickShare Configurator do the following:
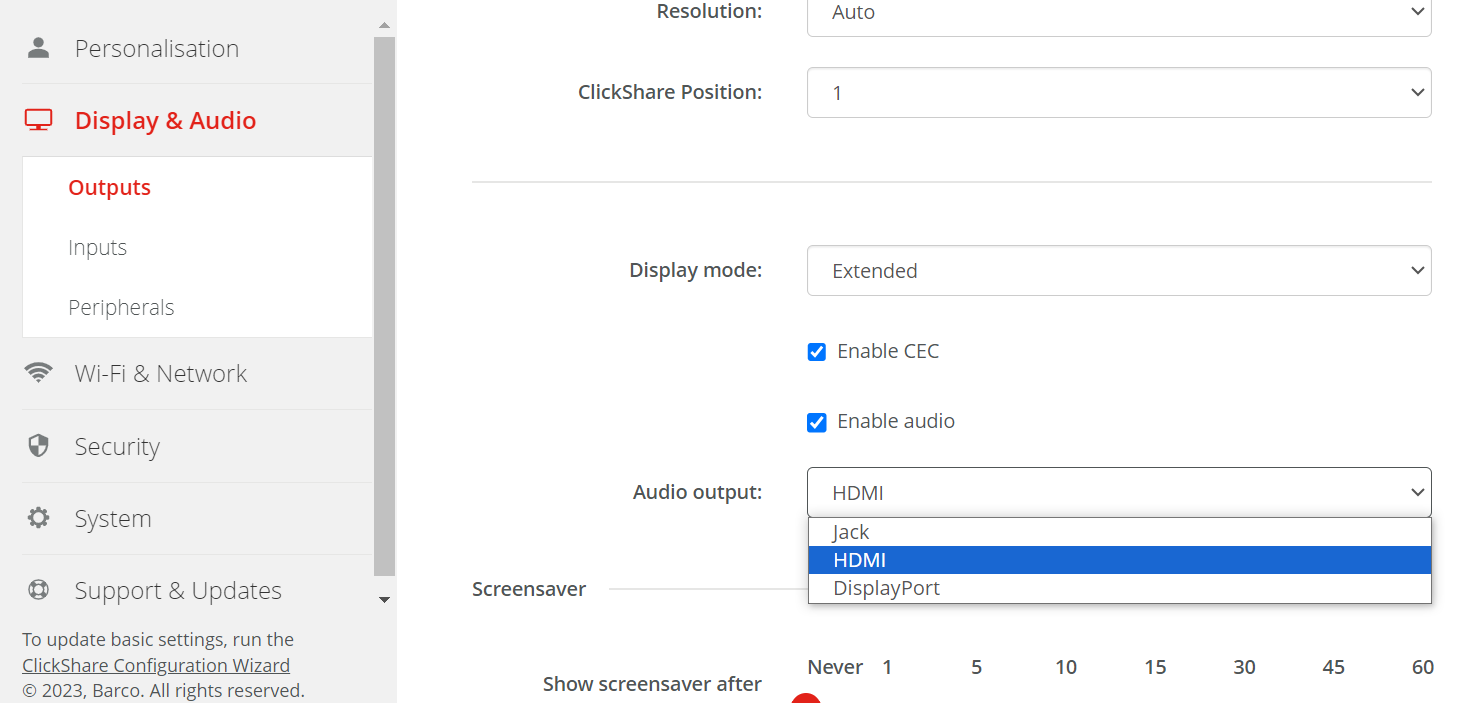
- Enable HDMI output:
- Make the following connections:
- Re-plug the USB peripheral(s) that were disconnected in step 1.a.i onto the CX-50 Gen2.
- Connect CX-50 Gen2 front USB-C port to the (MTR) computer unit USB-A port.
- Connect CX-50 Gen2 HDMI output to (MTR) Room System HDMI input.
- Go to the Display & Audio > Peripherals, select Enable peripheral switching and then select Modular Setup (Preview). Wait until the system is ready.
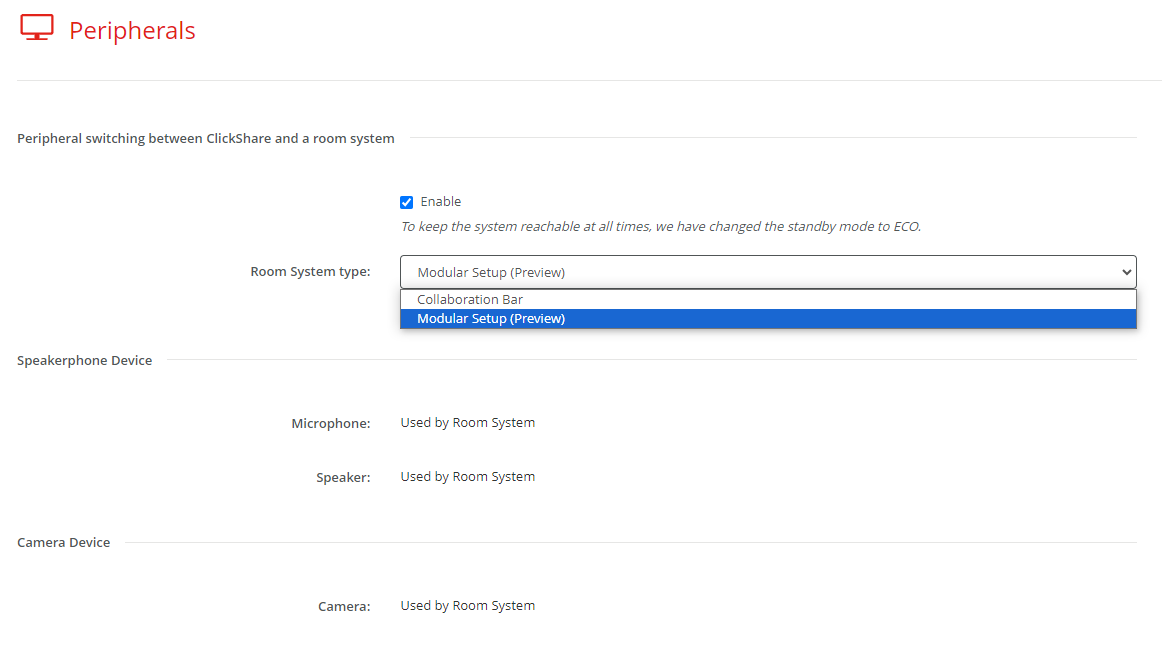
Caution: Make sure that the ClickShare Button is not plugged in to the laptop when enabling the Modular Setup (Preview) in the ClickShare Configurator.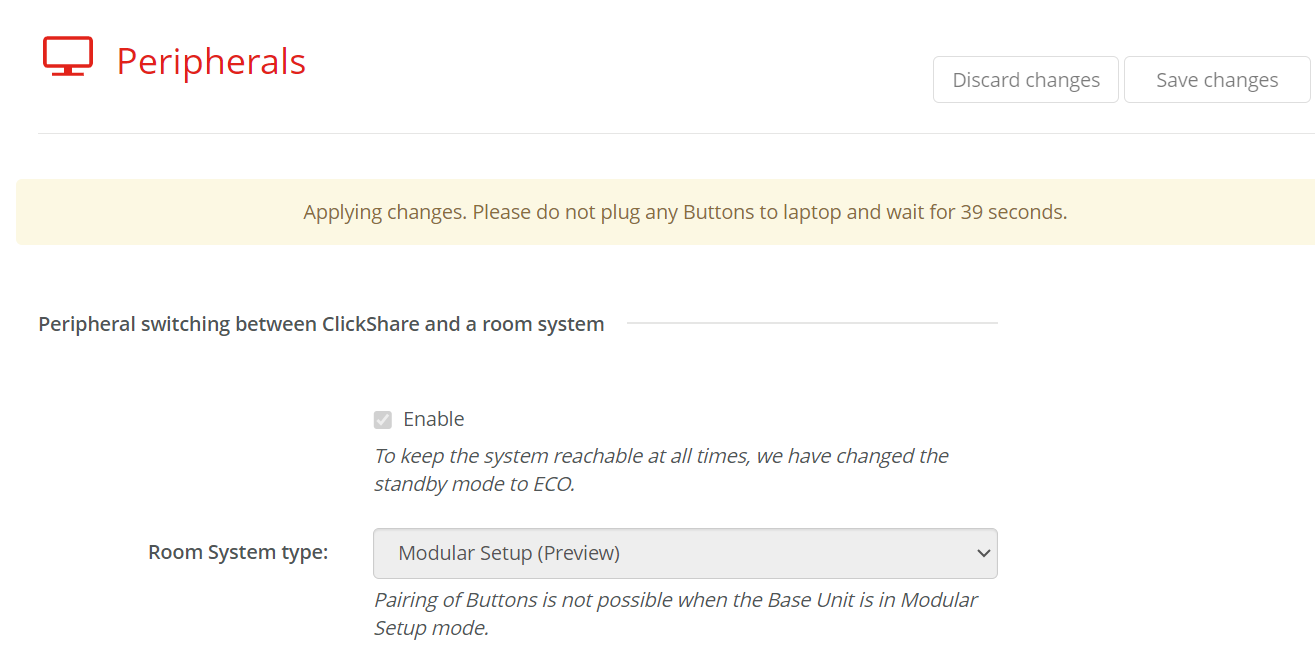
- PIN code is not supported in Modular Setup mode. Make sure to disable the passcode in the ClickShare Configurator.

- In the Logitech TAP do the following:
- Go to the Settings > Peripherals and do the following:
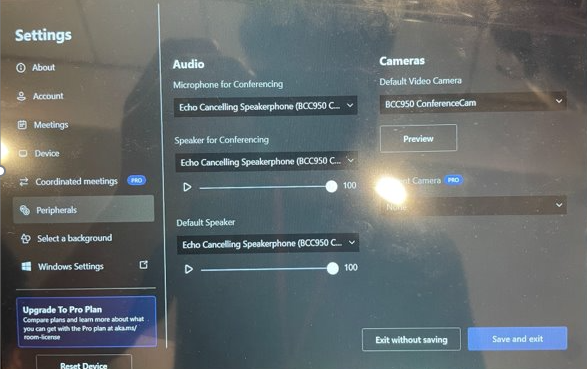
- Audio: select Echo Cancelling Speakerphone for the Microphone for Conferencing, Speaker for Conferencing and Default Speaker
- Cameras: select your camera as Default Video Camera
- Click Save and exit
- Go to the Settings > Meetings, enable Automatic screen sharing and click Save and exit.

- Go to the Settings > Peripherals and do the following:
Important note in this configuration!
It is important to set the system audio peripherals for every individual user to the audio peripherals of the laptop and NEVER to ClickShare Echo Cancelling Speakerphone. This should ONLY be set inside the UC Room (MTR or Zoom app) audio settings. Changing this can cause disconnect of the peripherals (Camera and audio).
It is important to set the system audio peripherals for every individual user to the audio peripherals of the laptop and NEVER to ClickShare Echo Cancelling Speakerphone. This should ONLY be set inside the UC Room (MTR or Zoom app) audio settings. Changing this can cause disconnect of the peripherals (Camera and audio).
Known limitations and how to use tips!
- When Modular Setup is enabled, Button pairing with the Base Unit is not possible in Room System mode. Make sure that all Buttons have already been paired before enabling Modular Setup.
- When Modular Setup (Preview) is enabled, only the ECO mode (in the ClickShare Configurator) can be used. If attempted to enable the Standby mode, it will automatically switch to the ECO mode.
- Shared content will be visible on the meeting room display after a delay of a few seconds (approx 6 to 10 seconds).
- An alert will be sent to the Teams admin portal whenever the system switches to BYOM mode, it happens because peripherals are detected unplugged from MTR. To disable, please configure your MTR system such that it does not send alerts to the Teams admin.
- Make sure that the windows default audio device is set to "Clickshare speaker" as default. Reason for this is that when a call is running on the MTR system and a user connects the button on his laptop and manually selects the "Room speakerphone" as default audio output, the audio and video of the MTR will switch to the ClickShare and leave the MTR call in a bad state. This setting is stored by windows internally and might cause an issue for the next connection to the room.
- Configuration of the MTR switching is only possible via the ClickShare Configurator of the Base Unit, not via the XMS Cloud.
- Do not connect the touch USB cable from the display to the CX-50 Gen2. Content Sharing would be problematic when switching from Appliance mode to Device mode. Also, when user stops sharing from Teams client, it won’t be able to switch back to Appliance mode.

