In this article, we are going to explain the different steps you need to take in MacOS (provided screenshots and workflow are from MacOS). This will include running the Button for the first time, granting the correct permissions, but also the workflow when you install the ClickShare App.
Some graphics shown in this article may differ depending on your MacOS version, but this will not affect the procedures mentioned in this article.
For a successful configuration, the admin of the PC must configure the settings.
Using ClickShare via the Button
- Insert the ClickShare Button into a free USB-C slot of your Mac.
- Click on the ClickShare Logo that appeared on your desktop and the ClickShare screen will open.

- Click ClickShare_for_MacOSX in the centre and the ClickShare App will open.
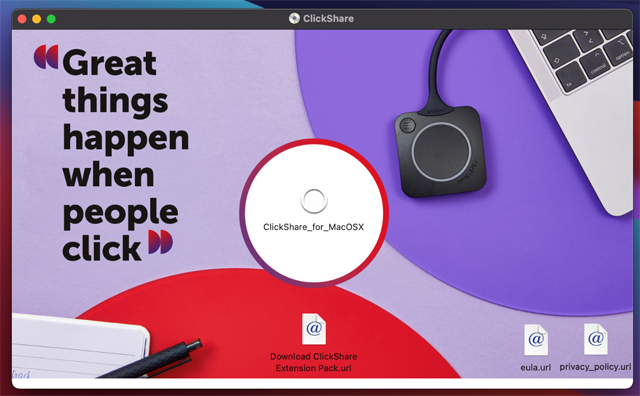
- Click on the physical Button or click the white circle in the ClickShare App.

- Since macOS Big Sur, Apple changes its Privacy Policy. This means that for every action you perform for the first time, you will need to grant permissions in your OS. Click OK in the popup from the ClickShare App.

- In the Screen & System Audio Recording Privacy Menu Toggle the clickshare app on. After providing your credentials (you will need an account with admin rights), you will see the toggle is now on for the clickshare app.

- Click Quit & Reopen.

- You are now ready to share your screen. After you completed these steps once, you won’t need to go through steps 5, 6, and 7 anymore. Next time you plug in the Button, only steps 1, 2, 3, and 4 will be your workflow.
Using ClickShare Conference (CX-series only)
- To start your first video call, make sure you are connected to the correct ClickShare and are ready to share your screen (see steps 1-8 above).
- Now connect to your meeting (using Teams, Zoom, Webex,...). For the screenshots below, we used Teams as our UC&C program. The moment you join a call, you will see the permission for using your microphone. Click OK.

- This will take you to the same Security & Privacy screen as in steps 5 and 6 of the previous chapter. You will need to give in your credentials and grant permission to the ClickShare App to use your microphone.
- When the popup comes to grant permissions for the use of your camera, please do the same as in step 3 above.
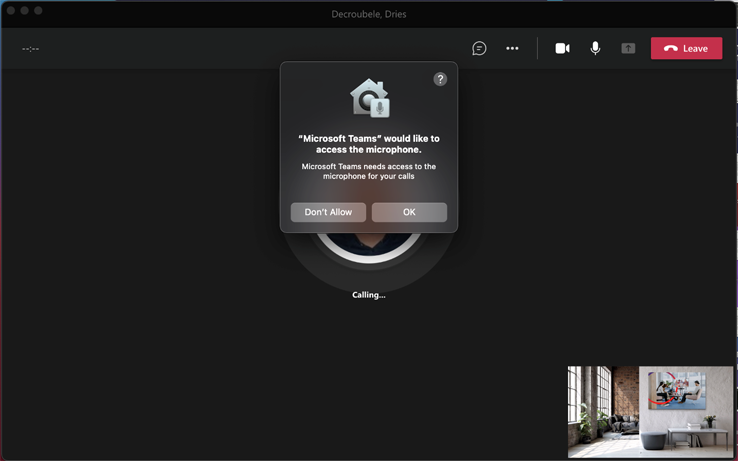
- You are now using ClickShare Conference. This is the workflow for first-time use. Next time you will use ClickShare Conference, you only need steps 1-4 from the first chapter, and then join your call.
Using ClickShare via the installed app
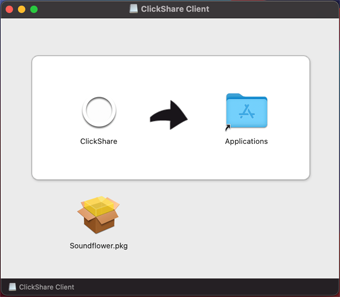
- You can install the app, via the installer located on the Button. Alternatively, you can download the app from our website www.clickshare.app. Open ClickShare_Setup.dmg and click on the ClickShare > Applications icon.

Installing the App will require Admin rights.
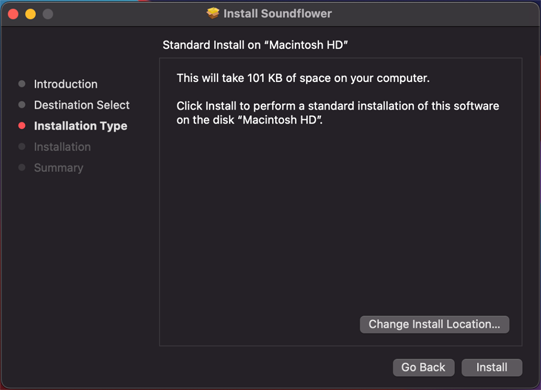
- The next step is the installation of Soundflower if you don’t have this already on your Mac. This will auto-start if needed. Follow the steps to install Soundflower.
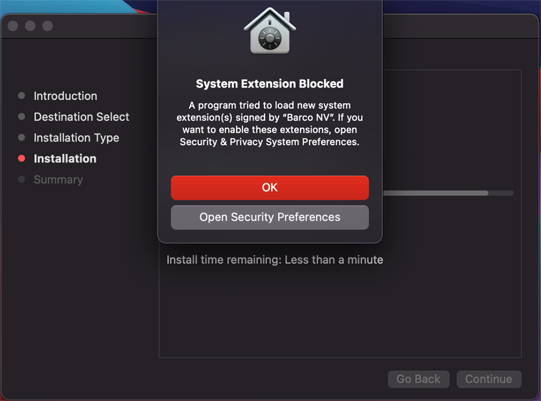
- The next Privacy popup is to trust Barco’s app. Click OK.
- Click the lock icon on the bottom left of the next screen, enter your credentials and click Allow.
- Click Restart.

Using the installed app
The app is now installed. The workflow is now exactly the same as you would be using a Button. This means that you can use topic Using ClickShare via the Button to go through the granting of the permissions.
App-based Conferencing is not available for MacOS yet, see KB 2073 for more details.
Audio Mirroring Information: KB 4666.
Related articles:
- Clickshare Desktop App on Mac PC crashes after launch
- How to use AirPlay to share to a ClickShare Base Unit from macOS
- Enabling macOS permissions for the ClickShare Desktop App
- What network protocols are supported for connecting devices (PC/mobile phone/tablet) to ClickShare?
- What are the supported AirPlay features for my Base Unit?
- How to share using ClickShare Desktop App?
- How to share with ClickShare Button


