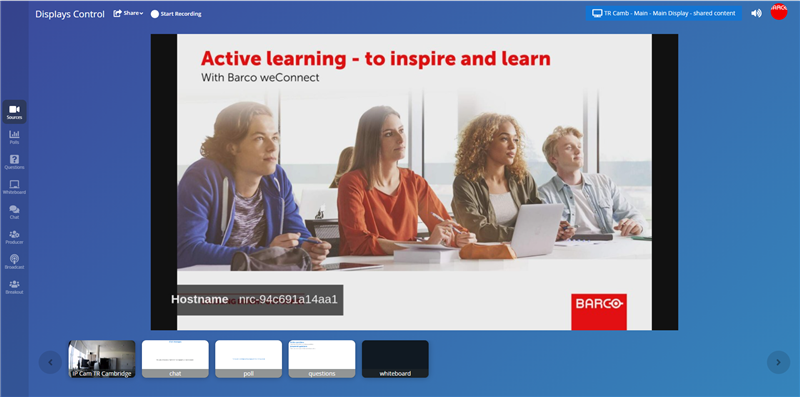
If you log in to an institute as a teacher and start a lecture (see [KB7793]) you will be directed to the Sources page of the teacher (host) user interface.
Overview of the pages in the teacher user interface:
- Managing the lecture from all pages
- Sources
- Polls
- Questions
- Whiteboard
- Chat
- Producer: see [KB11330]
- Breakout: see [KB11756]
Managing the lecture
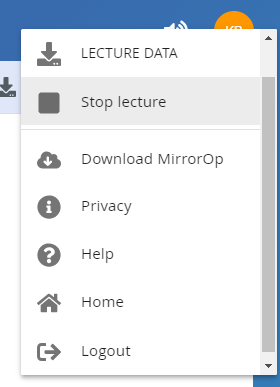
The lecture can be managed from the drop-down list that appears when the host clicks his/her avatar on the right top of the teacher user interface.![]()
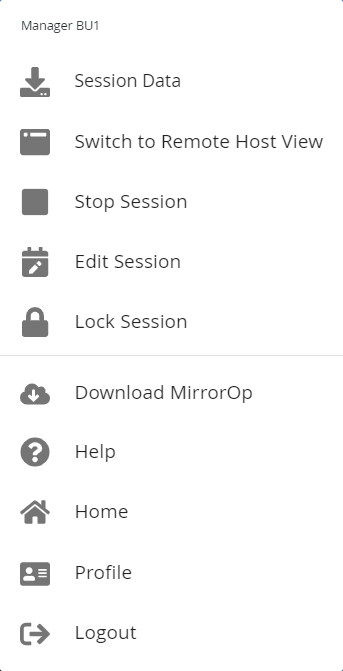
- Session data: triggers the download of an MS Excel file including Silent questions, Statistics, Chat history, etc.
- Switch to Remote Host View: opens de user interface, dedicated to a remote host
- Stop session: stops the lecture
- Edit session: allows to edit some parameters of the active session
- update the session name
- change the end time
- add a host
- add a participant
- Lock session: locks the session. From that point onwards nobody can log in to the session any more
- Download MirrorOp: Barco's screen sharing app
- Help: opens a new window and directs you to the support page (if defined for your institute)
- Home: directs you to the landing page of your institute. At that time you are logged out from the lecture
- Profile: shows your profile in weConnect
- Logout: logs you out from weConnect. The lecture remains active
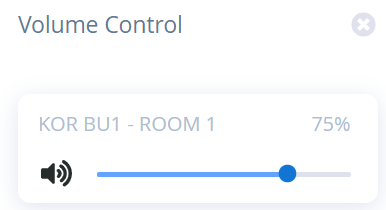
The audio level in the teacher room can be adjusted from the speaker icon on the top right of the teacher user interface. Click it to open the control panel. The default volume setting is 75%.
![]()
Sources: display control with moderation

At the center, you can see a live preview (at a low frame rate) of the content shared on the main display.
In a room with multiple displays to which you can share, you can choose to see the preview of any of the individual displays in the user interface by selecting it at the top right (drop-down list).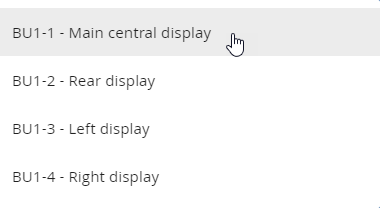
At the bottom, a row of thumbnails shows the available content streams that can be shared to the selected display. Press a thumbnail to share its content to the selected display. The title bar in the thumbnail lights up in blue while its stream is being shared.
It is possible to add multiple streams to the shared content in the same way. The layout automatically adapts to the number of streams that are being shared.
Each of the shared streams can be shown in a larger size by clicking the plus (+) sign in the preview, or in a smaller size by clicking the minus (-) sign. The layout is updated automatically.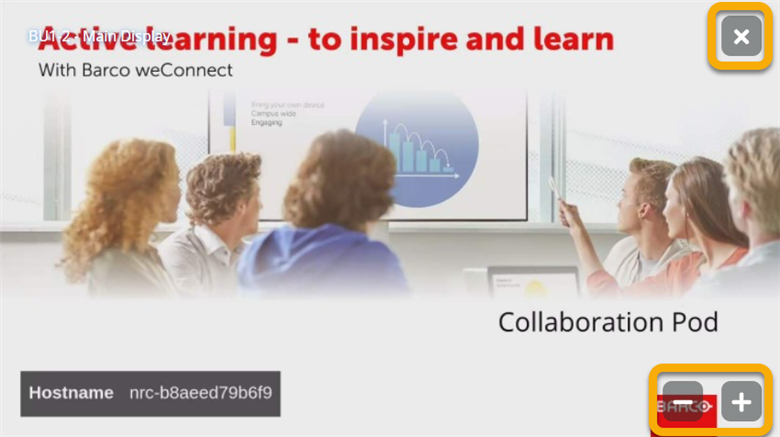
To stop sharing a stream, click its thumbnail again or click the x sign in its preview. The title bar of the thumbnail turns back to gray.
If there are more sources available than can be shown in the row of thumbnails at the bottom of the user interface, you can use the left and right navigation buttons to scroll through the list of available sources.
Content shared by participants to displays controlled by the lecture host does not automatically appear in the shared content. It pops up as an additional source thumbnail at the bottom of the teacher user interface. The host can add it to the shared content by clicking the corresponding thumbnail.
In a Collaboration room extra control capabilities are available: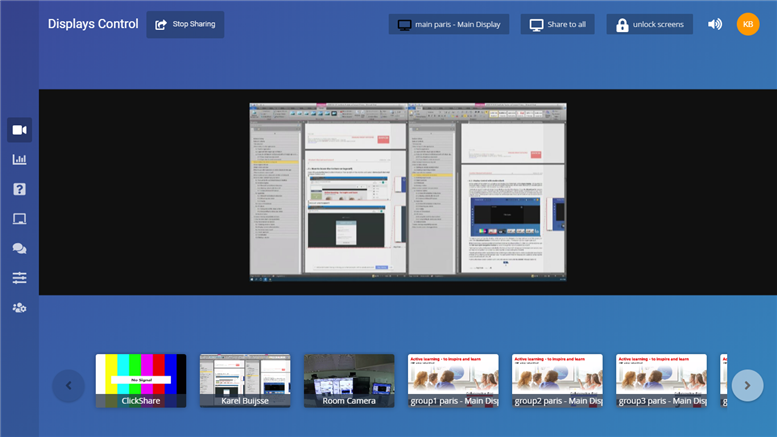
- the shared content on the display of each collaboration pod is available in the list of thumbnails at the bottom of the teacher user interface
- the displays of the collaboration pods can be locked/unlocked for sharing by clicking lock/unlock screens at the top of the teacher user interface
- the main display content can be pushed out to all collaboration pods by clicking Share to all at the top of the teacher user interface.
Polls: launching a quiz or poll

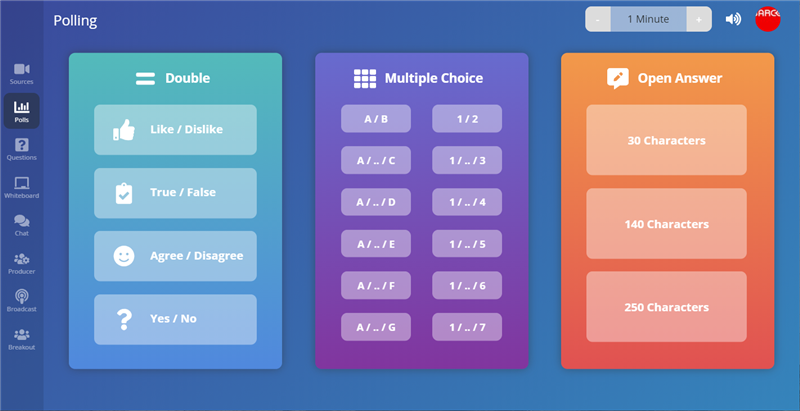
You can start a quiz or poll at any time from the Polling page in the left menu bar.
You can ask your question verbally, show it on the slide in your presentation or on a document you share on the main screen. Or you can write it on the whiteboard.
By default, the participants get 30 seconds to answer. At the top of the Polling page, you can change the time using the plus (+) and minus (-) buttons. The newly set time remains valid until it is changed again.
![]()
Alternatively, you can extend the poll duration while it is running. This change only applies to the current question.![]()
Choose the poll/quiz type:
- Double: two answers possible (Like/dislike - True/false - Agree/disagree)
- Multiple choice: up to a maximum of seven answers (A..G or 1..7), of which the only one that is correct
- Open answer: an edit box allowing for a defined number of characters (30 - 140 - 250)
When launching a poll or quiz, the possible answers (or an edit box) appear in the right bar of the participant user interface where they can click their preferred answer.
As a host, you can highlight the correct answer: this is not visible to the participants as long as the poll is on. Indicating the correct answer has the advantage that weConnect stores each participant's score. The results can be downloaded as part of the session data after the lecture has stopped or they can be shown on the thumbnails of the participants displayed on the tile nodes in a virtual classroom environment.![]()
While the poll is on you can keep track of the answers given by the participants and the number of answers received.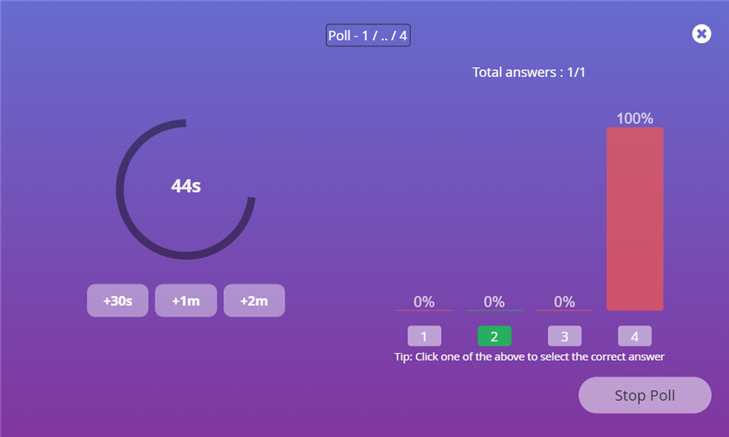
Click Stop poll at any time to stop this question. At this point, you can choose to click Display results, to disclose the correct answer to the participants. Finally, you can click Close poll and get to the next question, or back to the lecture.
![]()
![]()
![]()
Questions

Students can ask silent questions when this feature is enabled in your institute and not blocked by the host on the Chat page of the teacher user interface.
You will get notified in the teacher UI when a participant has asked a silent question by a red dot on the Questions icon.

Click the Questions icon to manage silent questions:
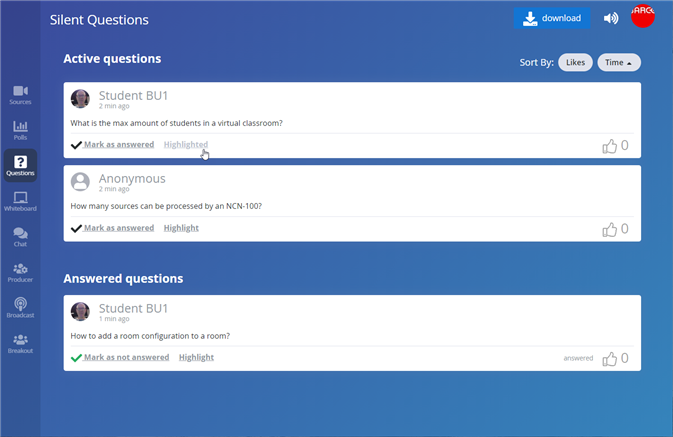
- Read the silent questions
- See how many likes a silent question scored
- Sort silent questions in chronologic order, or by the amount of likes
- Highlight a silent question: this is visible while sharing the questions to the main display (thumbnail at the bottom of the Sources page)

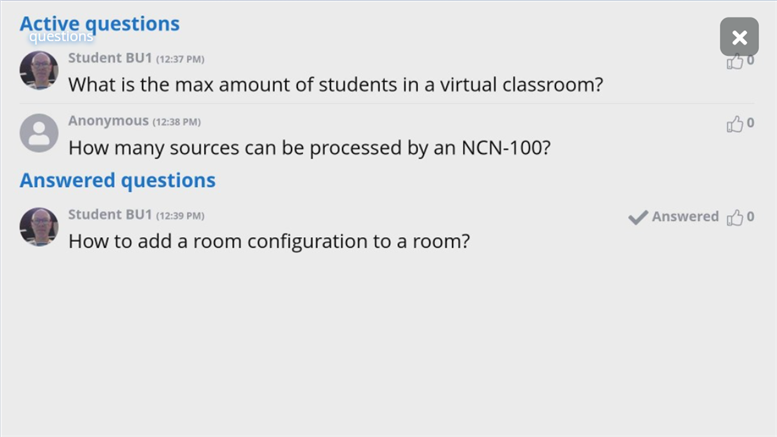
- Mark a silent question as answered. Answered questions appear in a section at the bottom of the user interface
- Download the silent questions as an MS Excel file
Whiteboard

Select the whiteboard tab on the right side of the teacher user interface to access the whiteboard.
By default, the whiteboard is available as a stream that can be selected from the participant's user interface. Next to that, the session host can decide to add the whiteboard to the shared content. This can be useful if a teacher wants to show it alongside another stream.
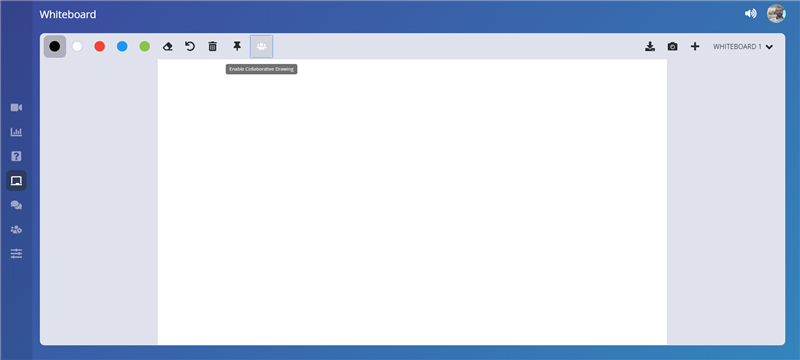
There are various tools available to facilitate getting the message across to lecture participants:

On the left side, you can find the tools to change the whiteboard content.
|
Tool |
Function |
|
|
Select drawing color |
 |
Select the eraser |
|
|
Undo last brush stroke(s) |
|
|
Clean the full whiteboard |
|
|
When virtual pointers are enabled, participants can drag & drop the pointer with their name anywhere on the whiteboard. |
|
|
Enable participants to actively contribute and add content to the whiteboard. Pen color and undo icon are available to the Participants |
On the right side, you can find the tools to manage various whiteboards.
|
Tool |
Function |
|
|
Download the current whiteboard drawing onto your device (PNG file) |
|
|
Take a screenshot from the shared content and show it on the whiteboard to allow annotation |
 |
Add a new whiteboard page |
|
|
Shows the currently selected whiteboard page Click to open the list and select any of the other whiteboard pages |
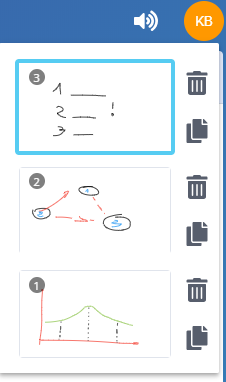 |
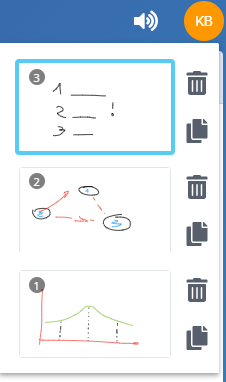
Open the whiteboard list and select a different whiteboard page to be opened by clicking its thumbnail. Hint:
|
|
|
Delete a whiteboard by clicking the bin icon next to it. Hint: |
Chat
Participants can add something to the chat (if this functionality has been enabled in your institute and if it is not blocked by the host). Chat messages are visible to all participants and hosts as soon as they are sent.
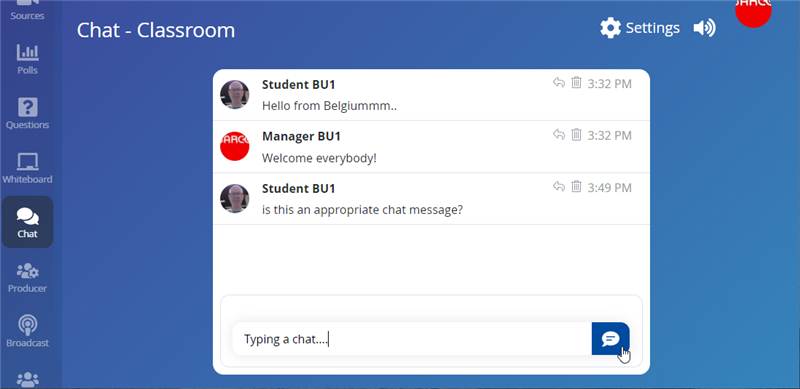
However, the host can decide to make the chat moderated during a lecture.
![]()
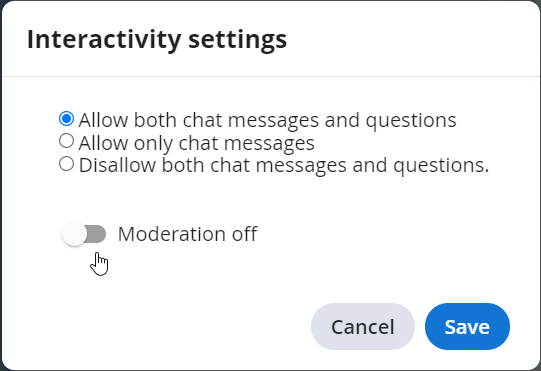
If moderation is enabled he/she receives the chats and can decide whether to publish the chat message or decline it.

Declined chat messages can be released and published by the host at any time.

Ending a session
You can end a lecture by pressing the avatar button on the top right of the UI. Select the Stop lecture option to end the session.
Optionally you can choose to download all data created with the quizzing, polling, and asking the silent questions. The whiteboard data is now included.
Participants will be informed when you are no longer using the room after a while and soon after that the session automatically closes off.

When nothing significantly happens during the lecture for a long time, the system will inform that the lecture will be closed in 15minutes. The user managing the lecture will be able to extend the lecture. The system will not end the lecture if any content is being shared, silent questions are being asked or quizzes and polls are being started.


