In this article we have five main chapters:
- Location setup
- Create a Main overflow room
- Configure the Main overflow room
- Create a Overflow room
- Configure the Overflow room.
At least one and up to three Overflow locations can be added while creating a lecture in a Main overflow room type.
There are several ways to configure a Main overflow room or Overflow room depending on the amount of nodes you have available. In his article we will set up the rooms with two nodes each:
- a Main node to show the shared content
- a Camera manager node to which the camera, microphone and speakers are connected.
Location setup
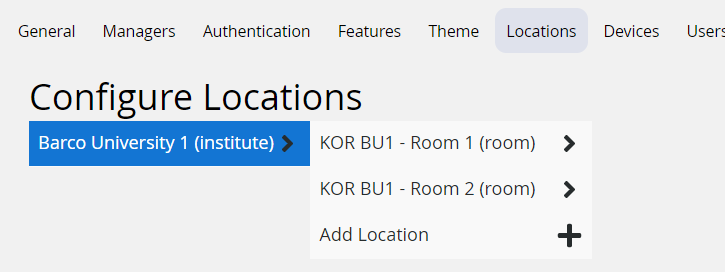
You need to have at least two rooms in your institute configuration. These rooms can be anywhere in the same institute, for example:

Create a Main overflow room
First, we will create a Main overflow room configuration. See [KB7723], section Configuring a standard room for more details.
- In the admin UI go to Locations
- Select a room
- Select tab Room configurations
- Click Add configuration
- From the dialog select Main overflow room
Configure a Main overflow room
Configuration of the Main node
- Choose one node to be the Main node and click Change role in its red bar
- From the drop-down list, select Main node
- Optionally click the red bar to open the configuration page of this node
- Configure the display in section Displays:
- assign role Main display to the display
- optionally change the display Title
- Click Save at the bottom of the page to store the settings

Configuration of the Camera manager node
- Choose (one of) the remaining node(s) to be the Camera manager node and click Change role in its red bar
- From the drop-down list, select Camera manager node
- Optionally click the red bar to open the configuration page of this node
- Configure the display in section Displays:
- assign role Combined remote auditorium monitor to the display
- optionally change the display Title

- Scroll down to section USB cameras
- assign role Teacher camera to the USB camera connected to this node
- under Audio, select the audio input connecting the teacher microphone (must be an Acoustic Echo Cancelling mic)
- optionally change the camera Title

- Scroll up to section Audio input
- the role of the audio input is filled in already (because it has been assigned in section USB Cameras)
- optionally add a Title

- Scroll down to section Audio output
- choose the audio output device (speakers) connected to this node and assign it the role Main mix (all sources) or Main mix at constant volume
- optionally add a Title

- Click Save at the bottom of the page to store the settings
Optionally configure a Far-view/confidence node
If you have one more node available you can set it up as a Far-view/Confidence node, having a Combined self-view monitor, which combines both streams that are sent out to the remote locations in a PiP format: the teacher camera and the shared content.
Create an Overflow room
Now, we will create an Overflow room configuration. See [KB7723], section Configuring a standard room for more details.
- In the admin UI go to Locations
- Select a room
- Select tab Room configurations
- Click Add configuration
- From the dialog select Overflow room
Configure an Overflow room
Configuration of the Main node
- Choose one node to be the Main node and click Change role in its red bar
- From the drop-down list, select Main node
- Optionally click the red bar to open the configuration page of this node
- Configure the display in section Displays:
- assign role Combined monitor to the display
- optionally change the display Title
- Click Save at the bottom of the page to store the settings

Configuration of the Camera manager node
- Choose (one of) the remaining node(s) to be the Camera manager node and click Change role in its red bar
- From the drop-down list, select Camera manager node
- Optionally click the red bar to open the configuration page of this node
- Configure the display in section Displays:
- assign role Self view monitor (i.e. room camera that is streamed out) or Combined remote auditorium view (room camera streams of the other remote locations) to the display
- optionally change the display Title

- Scroll down to section USB cameras
- assign role Room camera to the USB camera connected to this node
- under Audio, select the audio input connecting the room microphone (AEC mic)
- optionally change the camera Title

- Scroll up to section Audio input
- the role is filled in already (because it has been assigned in section USB Cameras)
- optionally add a Title

- Scroll down to section Audio output
- Choose the audio output device (speakers) connected to this node and assign it the role Main mix (all sources) or Main mix at constant volume
- optionally add a Title

- Click Save at the bottom of the page to store the settings
Optionally configure a Far-view/confidence node
If you have one more node available you can set it up as a Far-view/Confidence node, having a Combined remote auditorium view or Self view monitor.

[KB7751] Audio setup and calibration gives an overview on how to set up rooms so that the audio levels are correct for remote learning and overflow use. After this initial setup use the audio calibration instructions to ensure a great user experience.


