The procedure below explains how to use the extended desktop functionality using the ClickShare Desktop App on your Windows PC.
Make sure the ClickShare Extension pack is installed on your computer prior to using the ClickShare extended desktop functionality. The ClickShare Extension Pack is available for download here.
If the ClickShare Desktop App (MSI) with the Extended Desktop feature enabled is already installed on your computer, there is no need to separately install the ClickShare Extension Pack for Extended Desktop functionality, as it is included by default with the ClickShare Desktop App (MSI).
Procedure - ClickShare Extended desktop function in new user interface
- Launch the ClickShare Desktop App and select your meeting room from the list.
Enter the 4-digit pin code if prompted, the pin code is shown on the meeting room screen.
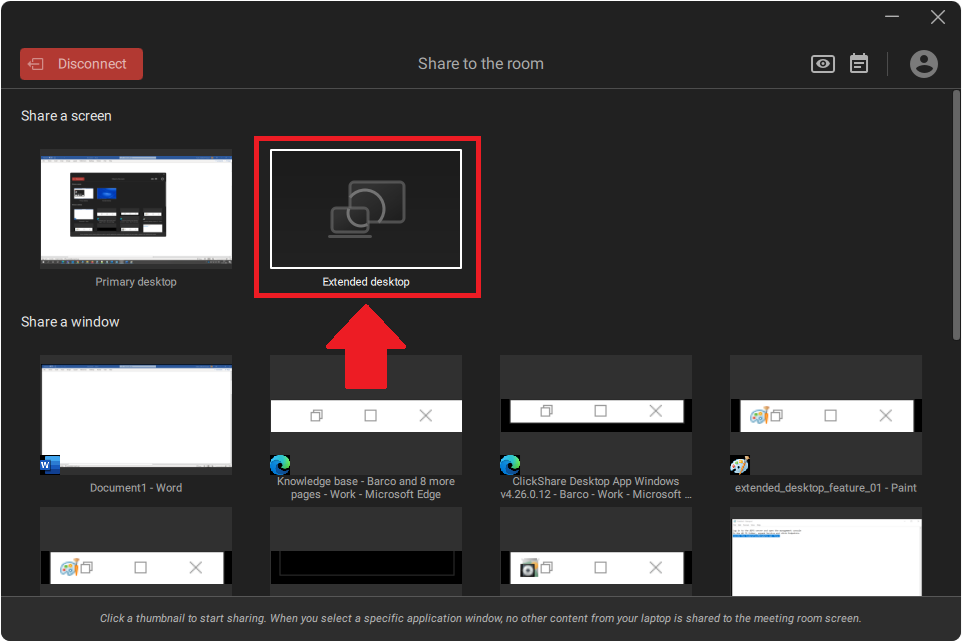
- Click the Extended desktop thumbnail in the GUI to enable the ClickShare as your extended desktop.

The Extended desktop thumbnail surrounded by a red colour boundary and with the embedded unshare and pause/unpause button will be shown in the GUI.
- On your laptop, select and move the content you want to show as extended desktop on the meeting room screen.
- Control the shared content by doing:
 : Click to unshare the extended desktop window.
 /
/  : Toggle button - click to pause and unpause the shared content respectively.
Procedure - ClickShare Extended desktop function in old user interface
- Launch the ClickShare Desktop App and select your meeting room from the list.
Enter the 4-digit pin code if prompted, the pin code is shown on the meeting room screen.
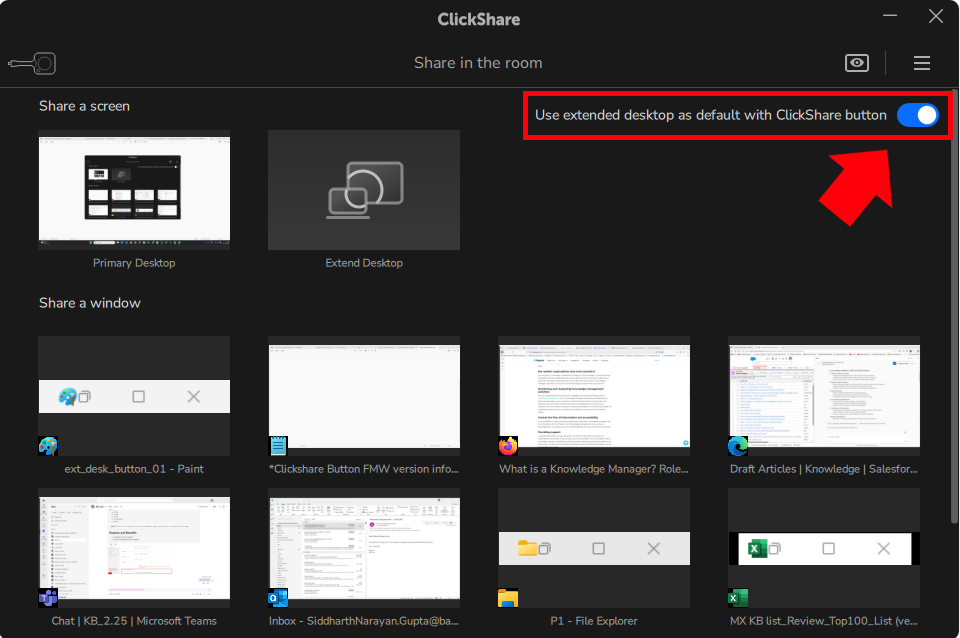
- Enable ClickShare as your Extended desktop: Click the 'quick button' top right in the ClickShare application and toggle the "Extended desktop" option in the menu.

When doing so, the extended desktop sign will appear on the top right corner of the virtual Button (white circle on the right)
- Click the virtual Button (white ring) to share your virtual extended desktop to the meeting room screen.


